
Understanding User Matches in Subject-Based Surveys
Think of a user match as a digital bridge connecting two people in your survey system. This bridge ensures that when someone fills out a survey, their responses get assigned to the correct person.
A user match links a subject—the person being evaluated—with a respondent, who's the observer sharing feedback.
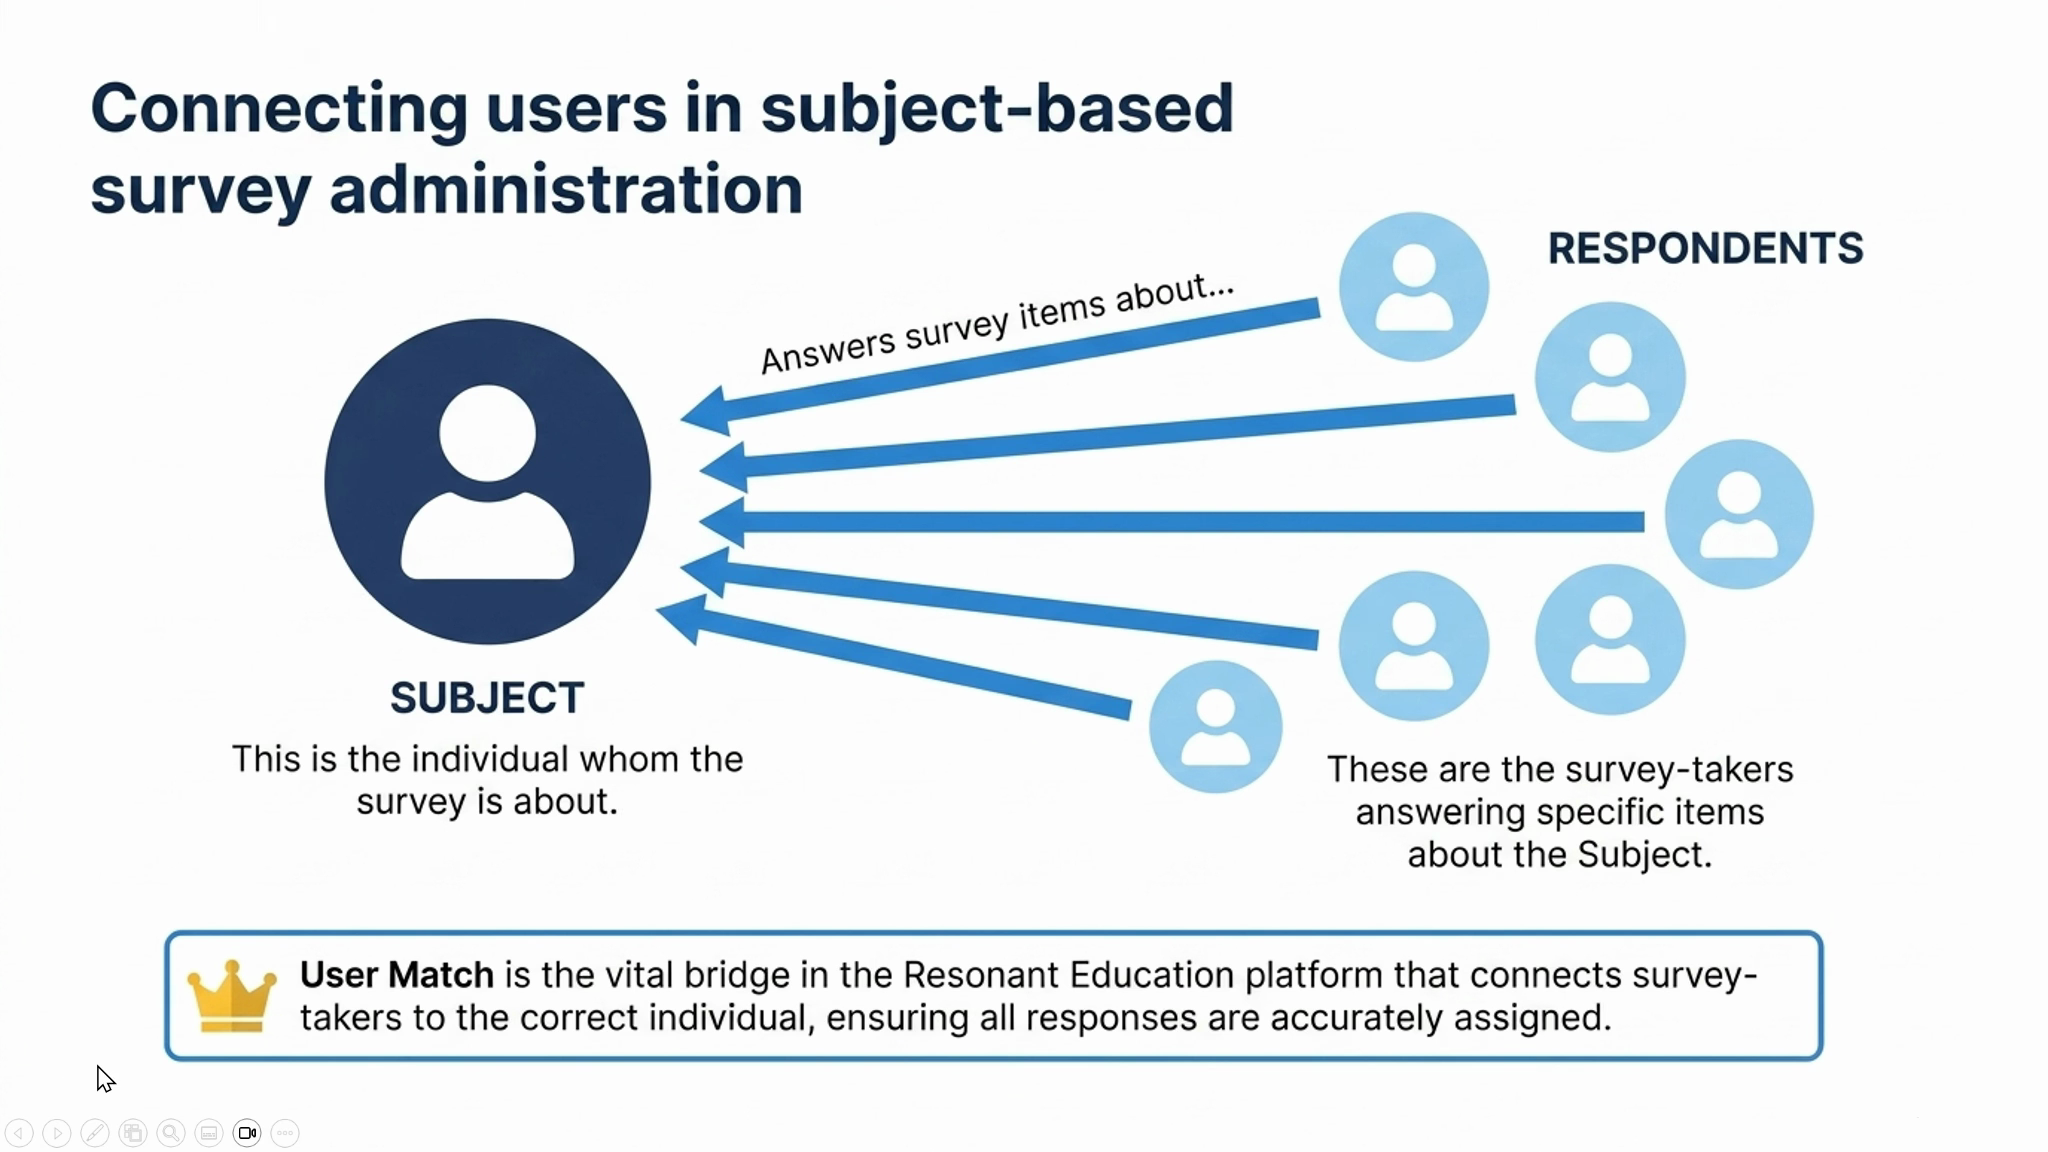
Roles: Subject and Respondent
The subject is the individual you’re learning about. The respondent answers questions about the subject’s behavior, skills, or actions. A user match pairs these two roles.
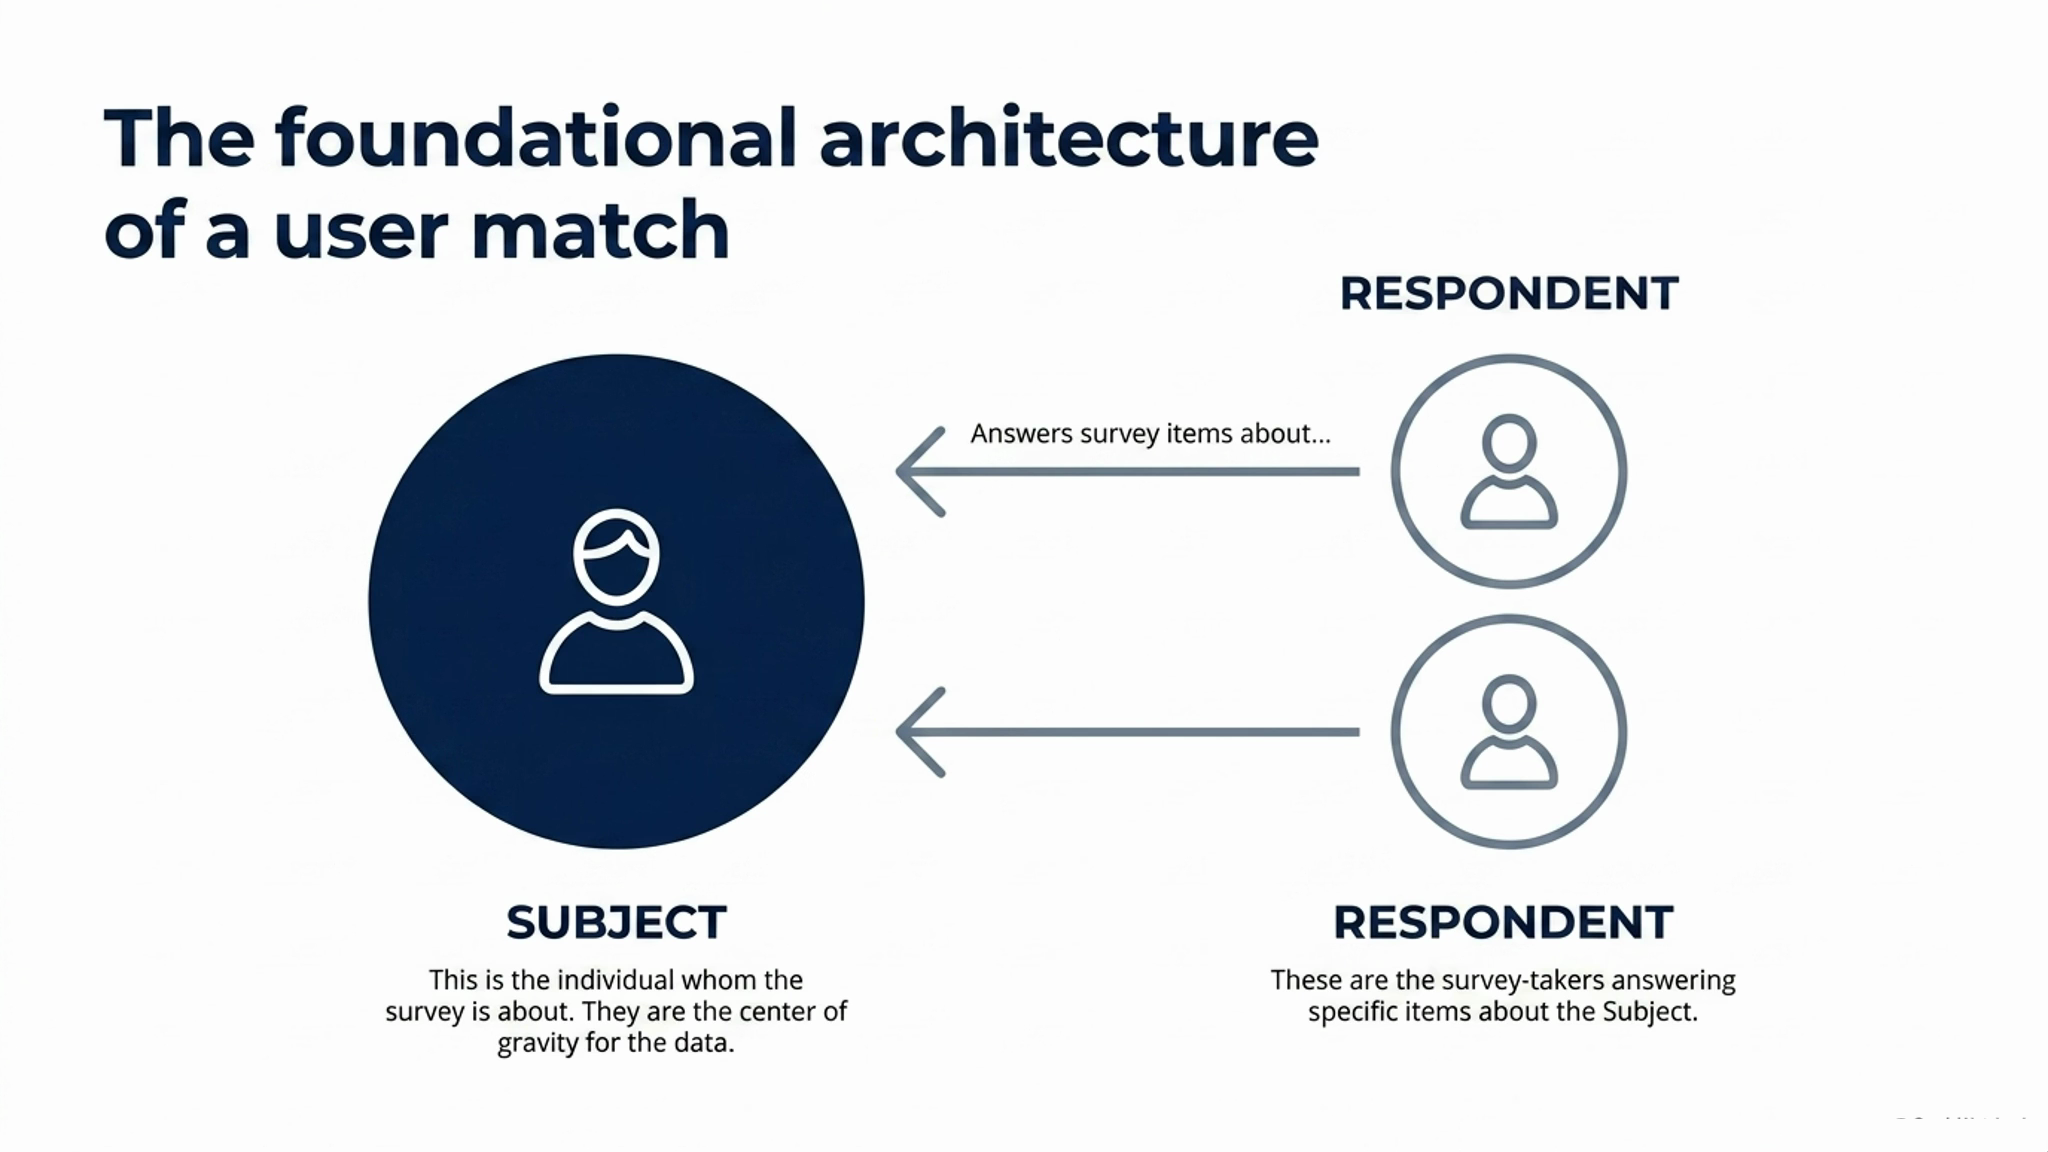
Subject-Based Surveys: SSIS and VALED
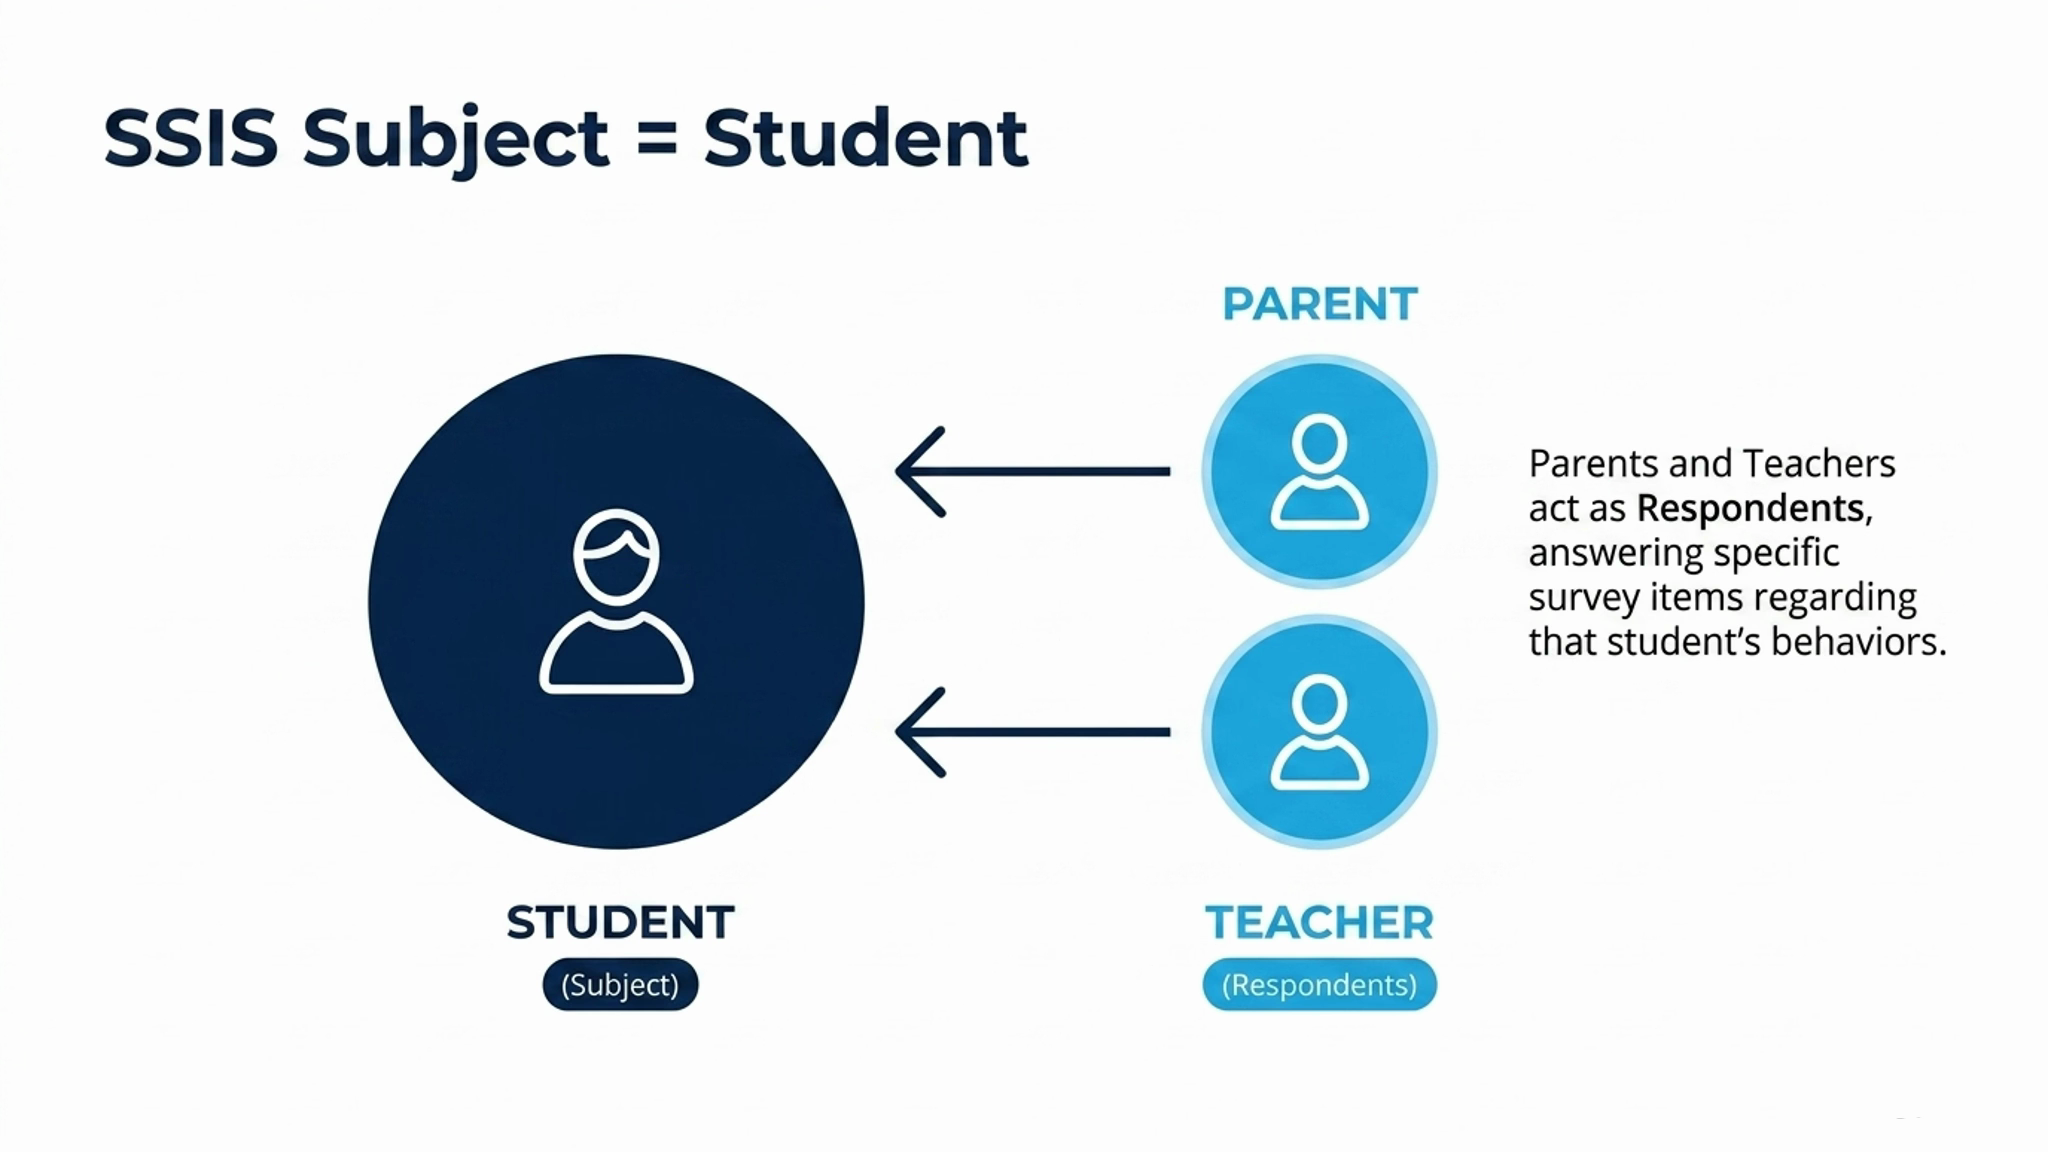
In SSIS, the student is always the subject—the person being evaluated. Parents and teachers are the respondents. They fill out surveys about the student’s behavior, and the match makes sure the right survey reaches the right person.
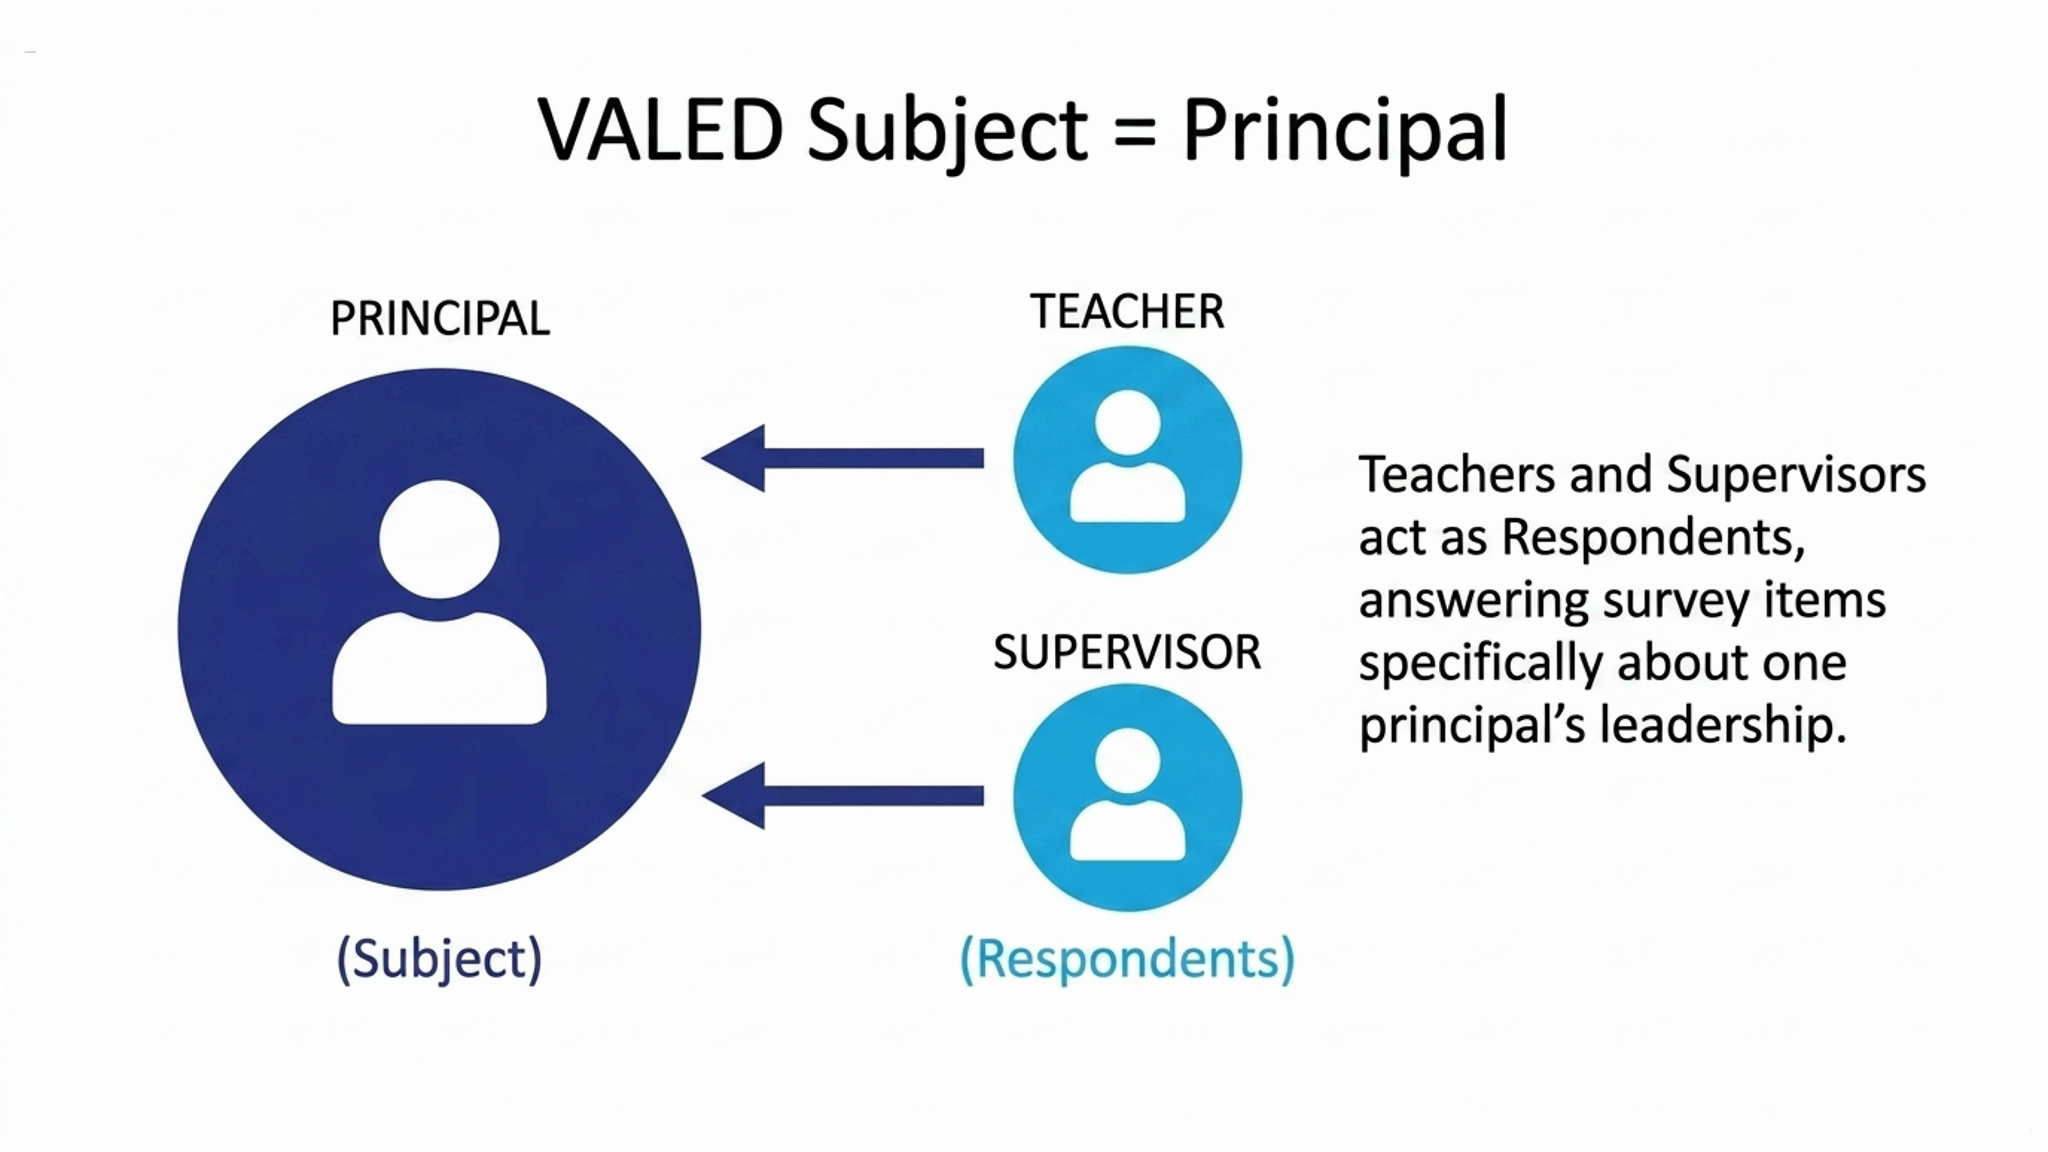
For VALED, the process is similar, but the roles can shift. In the school-based principal version, for example, the principal is the subject. Teachers and supervisors are the respondents who provide feedback about the principal’s leadership. The match ensures surveys get to the appropriate observers, linked to the correct subject.
Managing User Matches in the Portal
Finding and editing user matches in your survey portal is simple if you focus on the person being evaluated. All match information lives inside the subject’s profile.
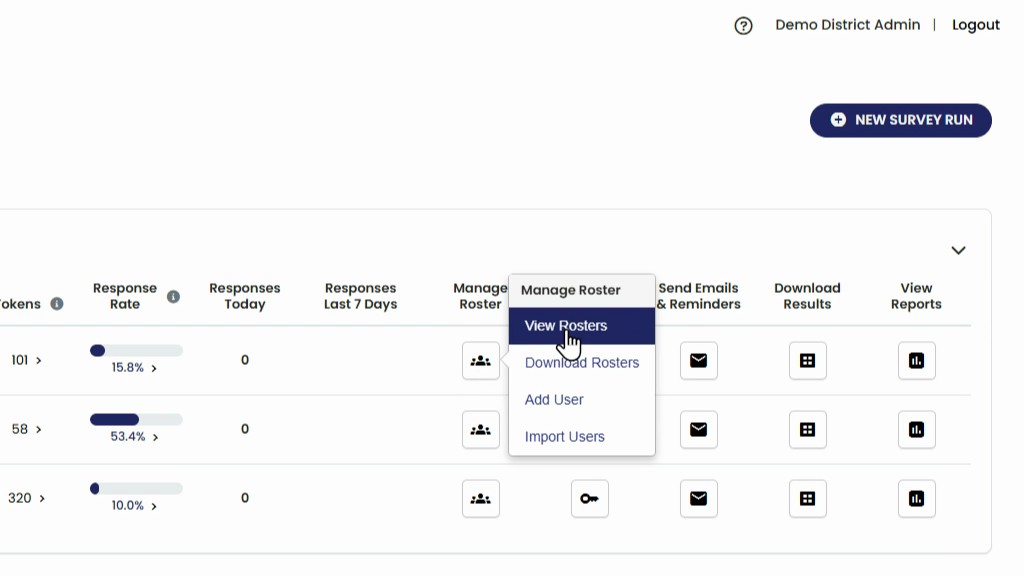
Step 1: Go to your dashboard. In the Manage Roster column, click View Rosters.
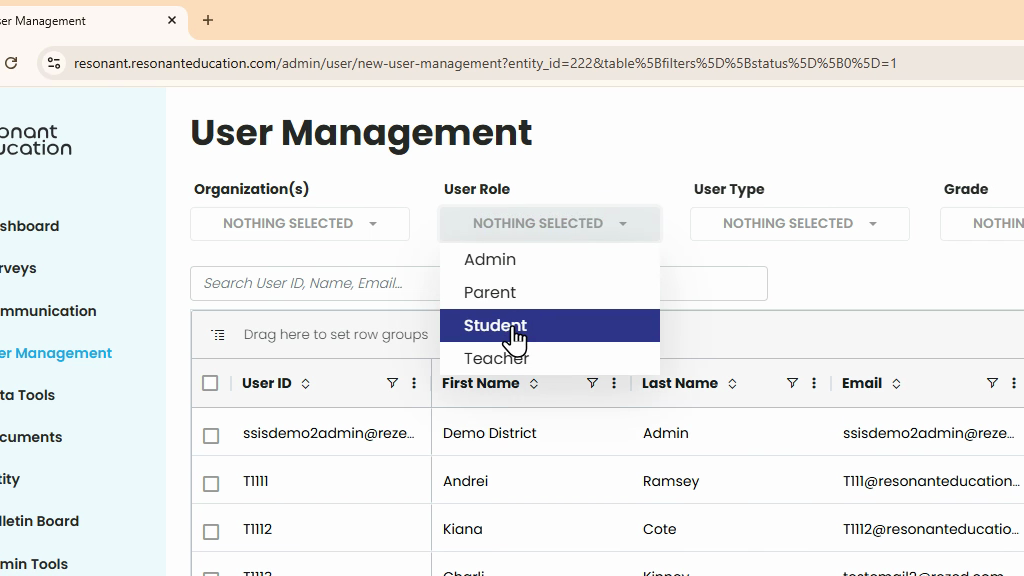
Step 2: In this example, we will use an SSIS survey. On the user management page, filter for the student role, since students are the subjects in SSIS.
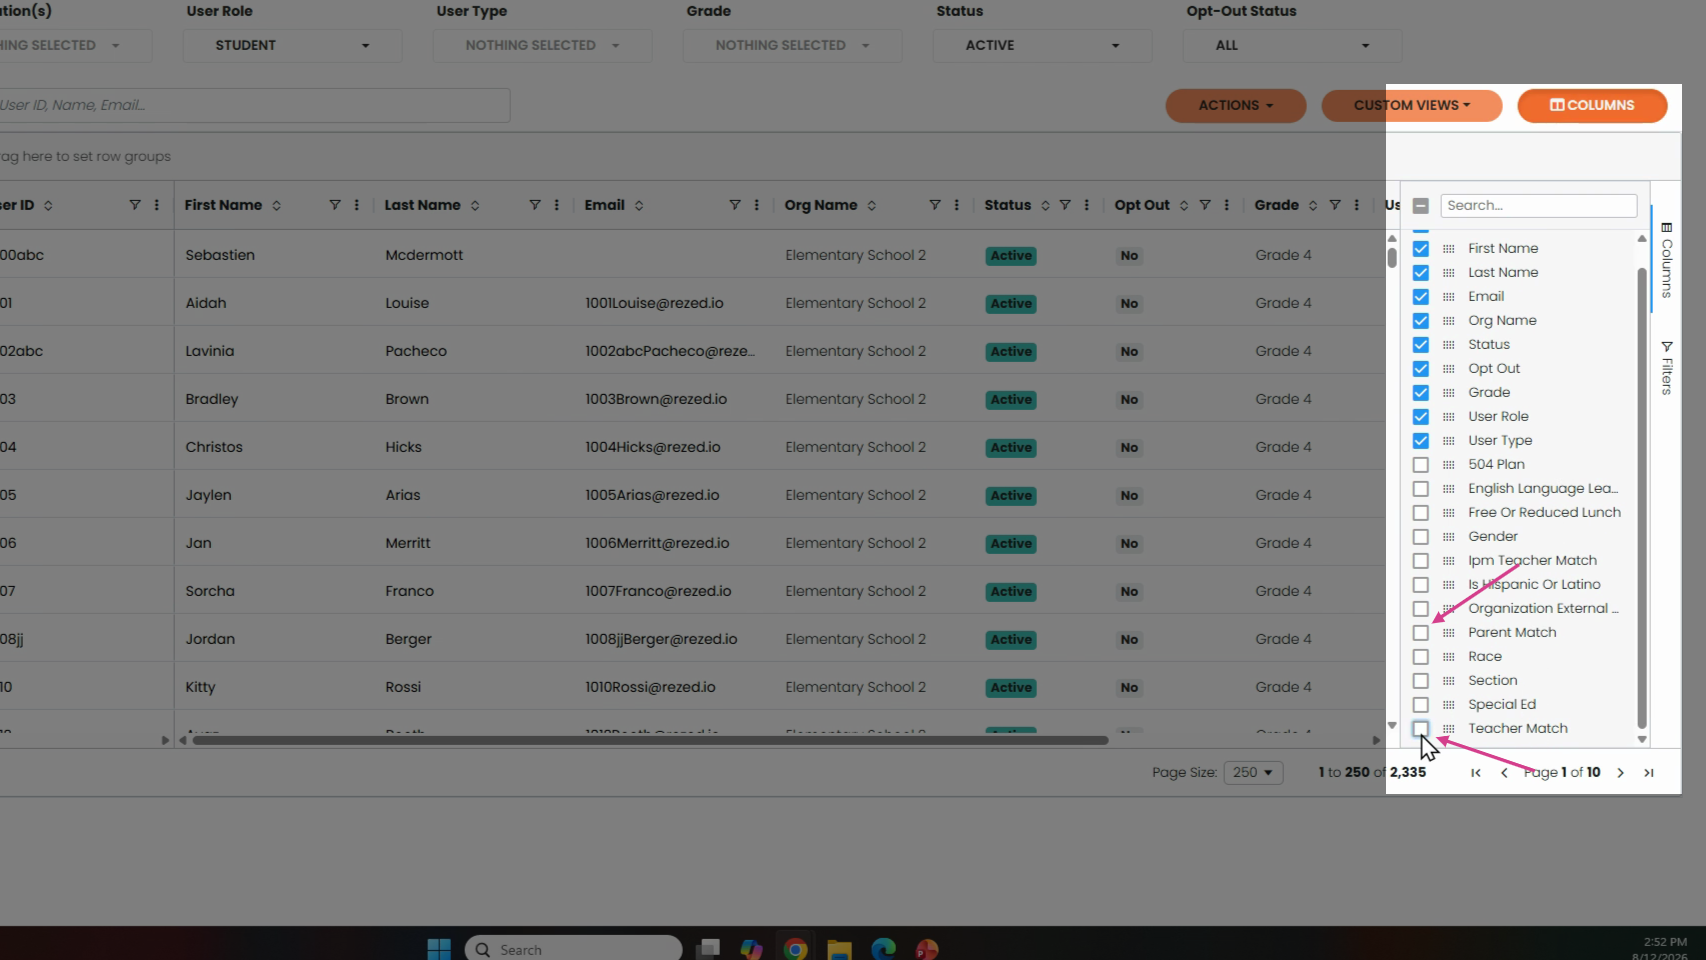
Step 3: Click Columns, then scroll to select which match columns you want displayed, like Parent Match or Teacher Match.
Step 4: Turn on the column for the match that you are working with. A new column shows up onscreen. If a student–teacher match exists, you’ll see the teacher’s ID in the column. If the student is not matched to a teacher, you will see a blue Add button.
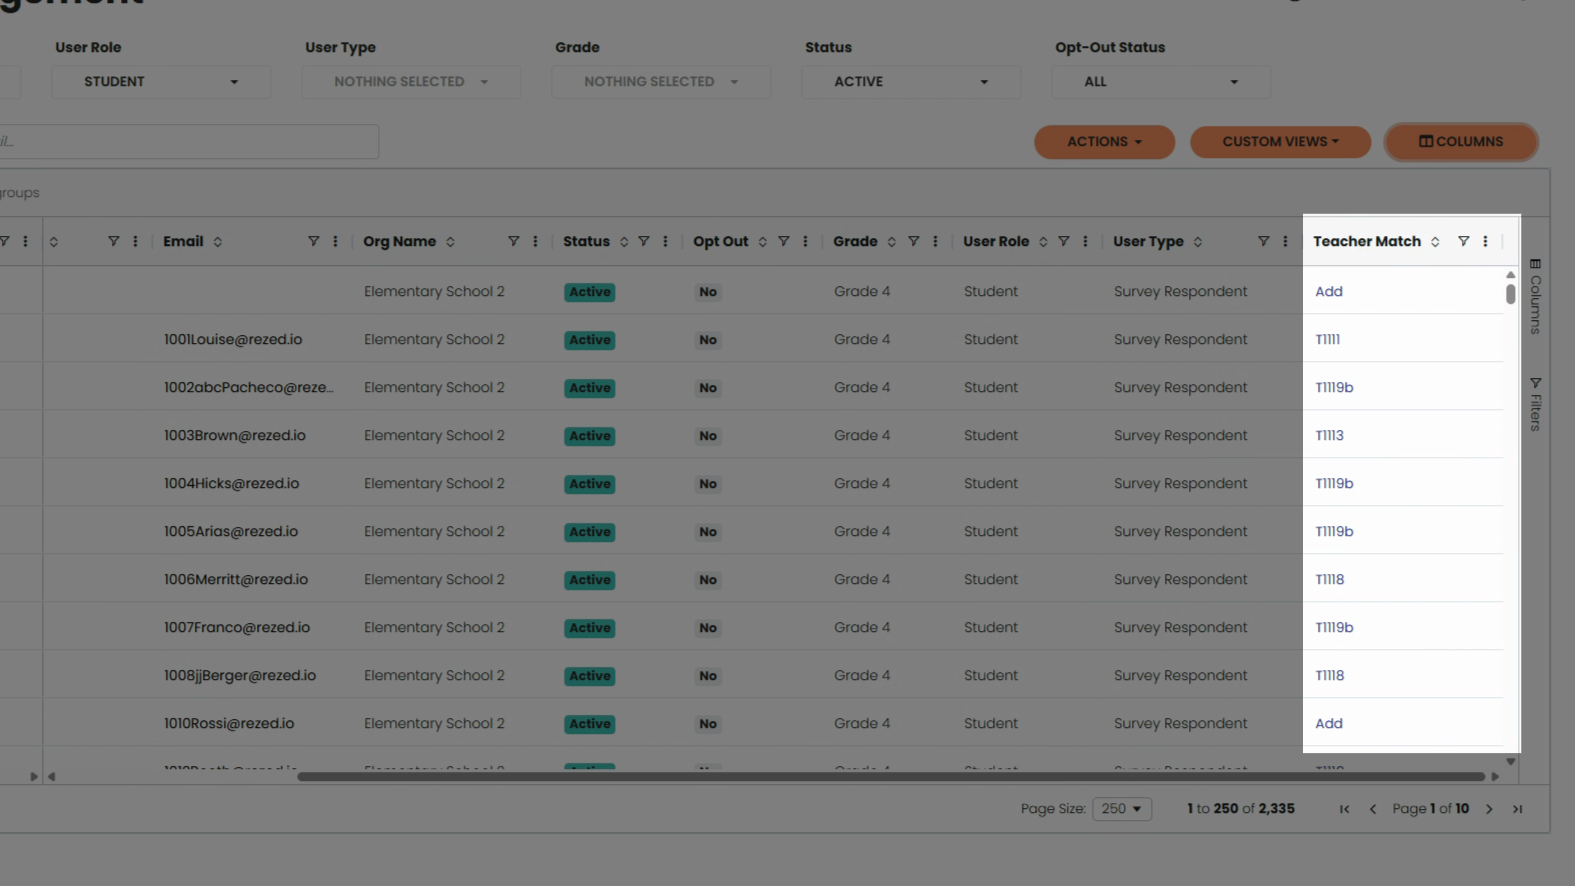
Step 5: Clicking the ID will show you match details.
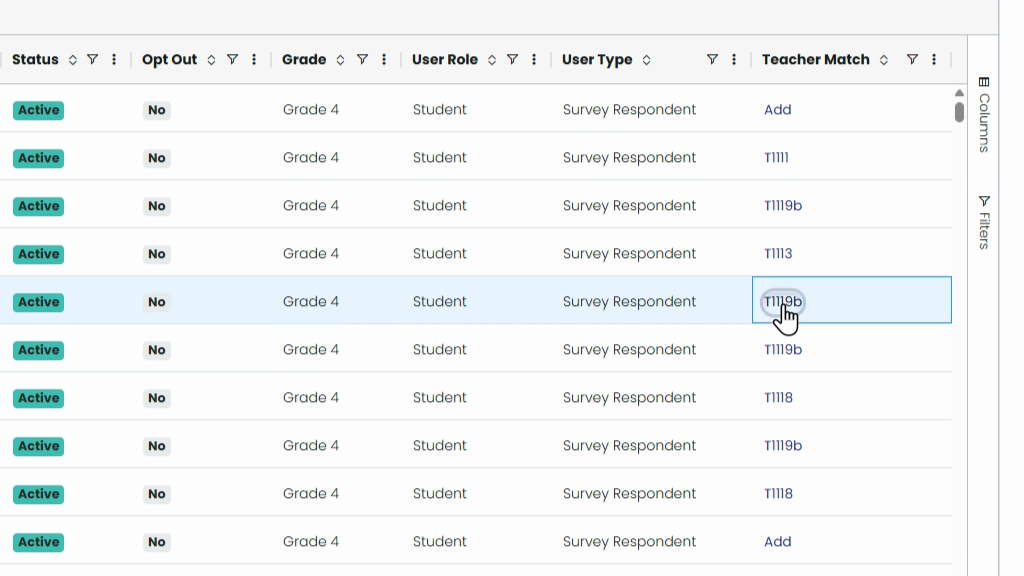
Step 6: Clicking Add starts a new match—select the right match type and enter the respondent’s ID.
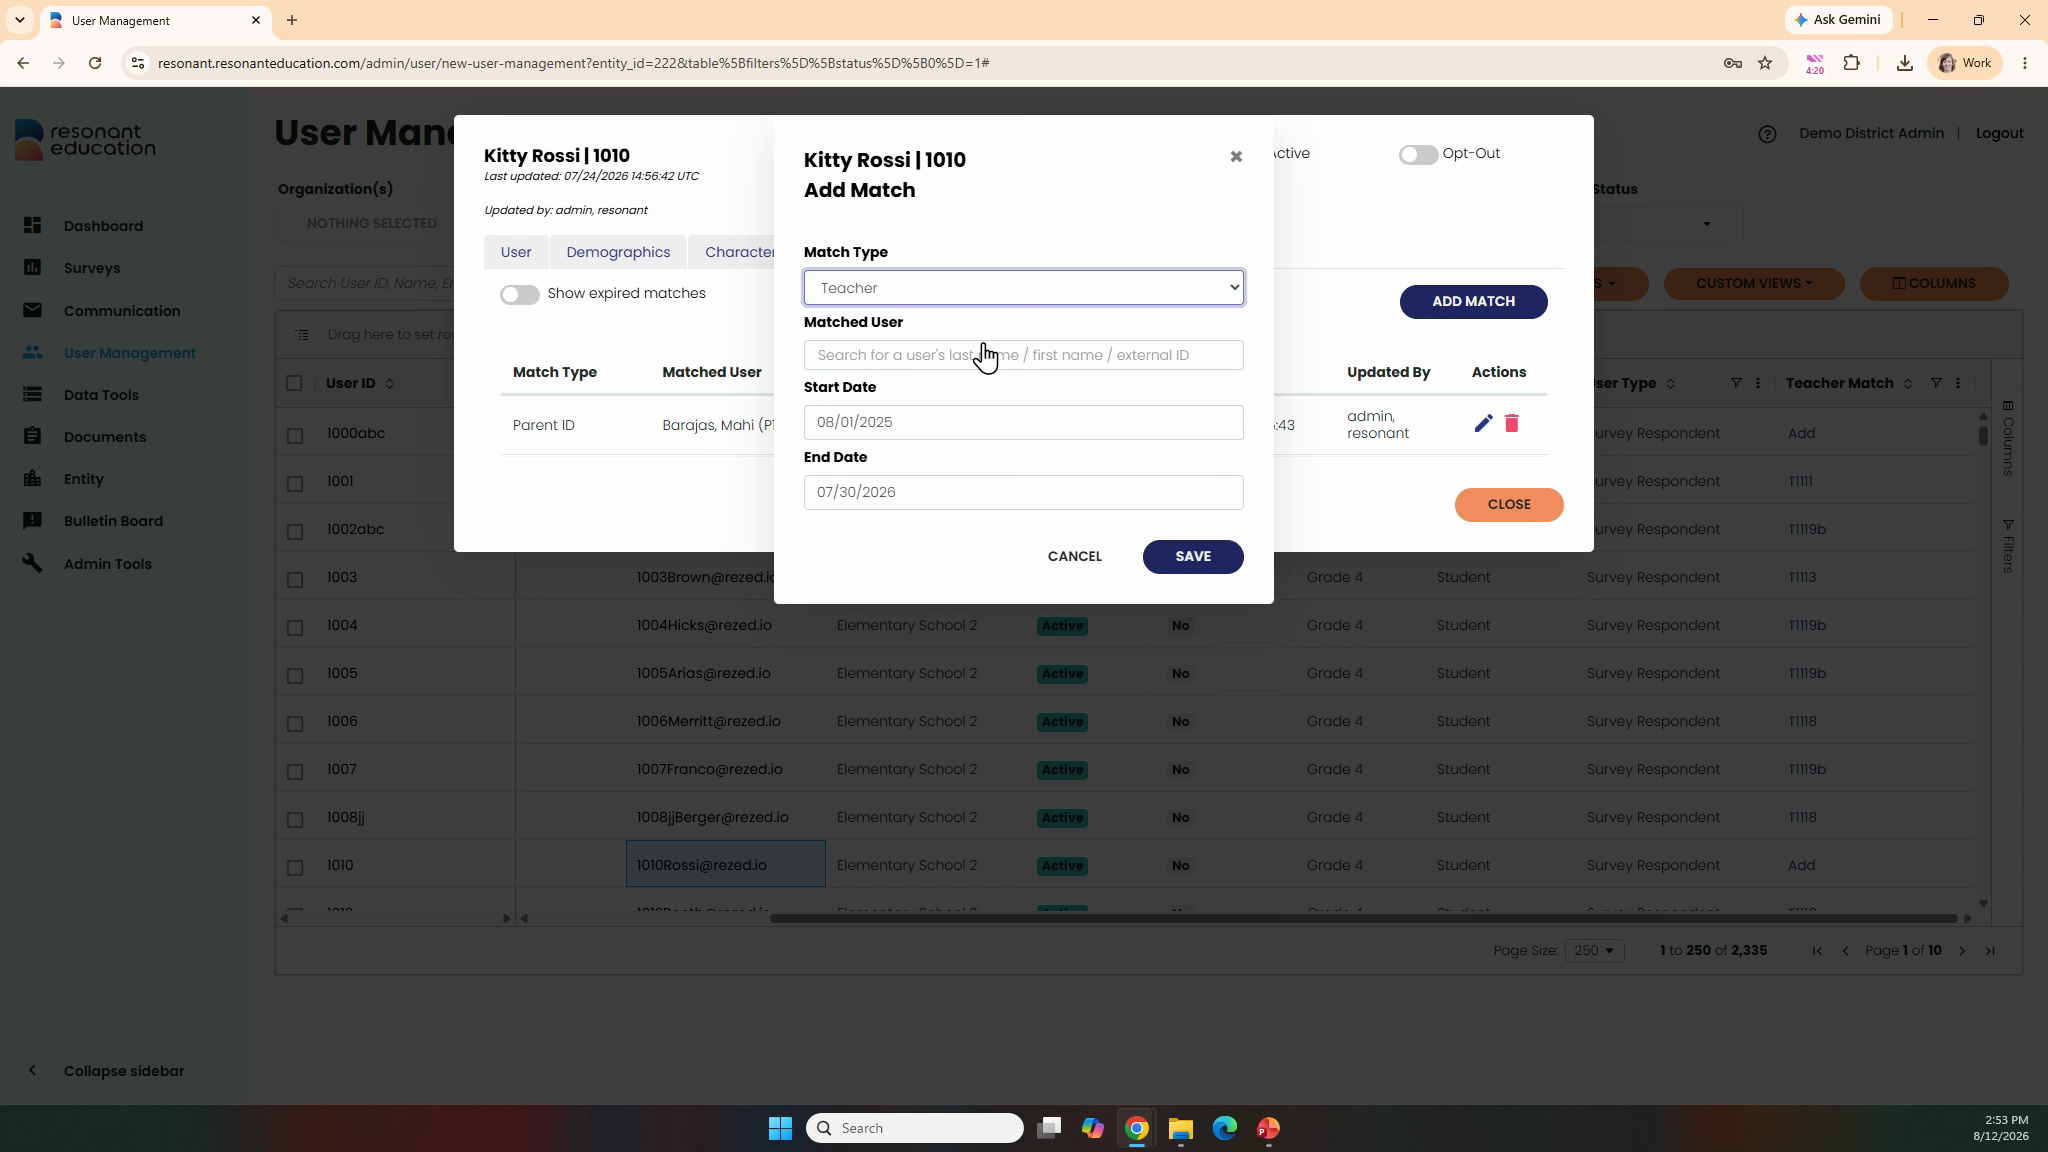
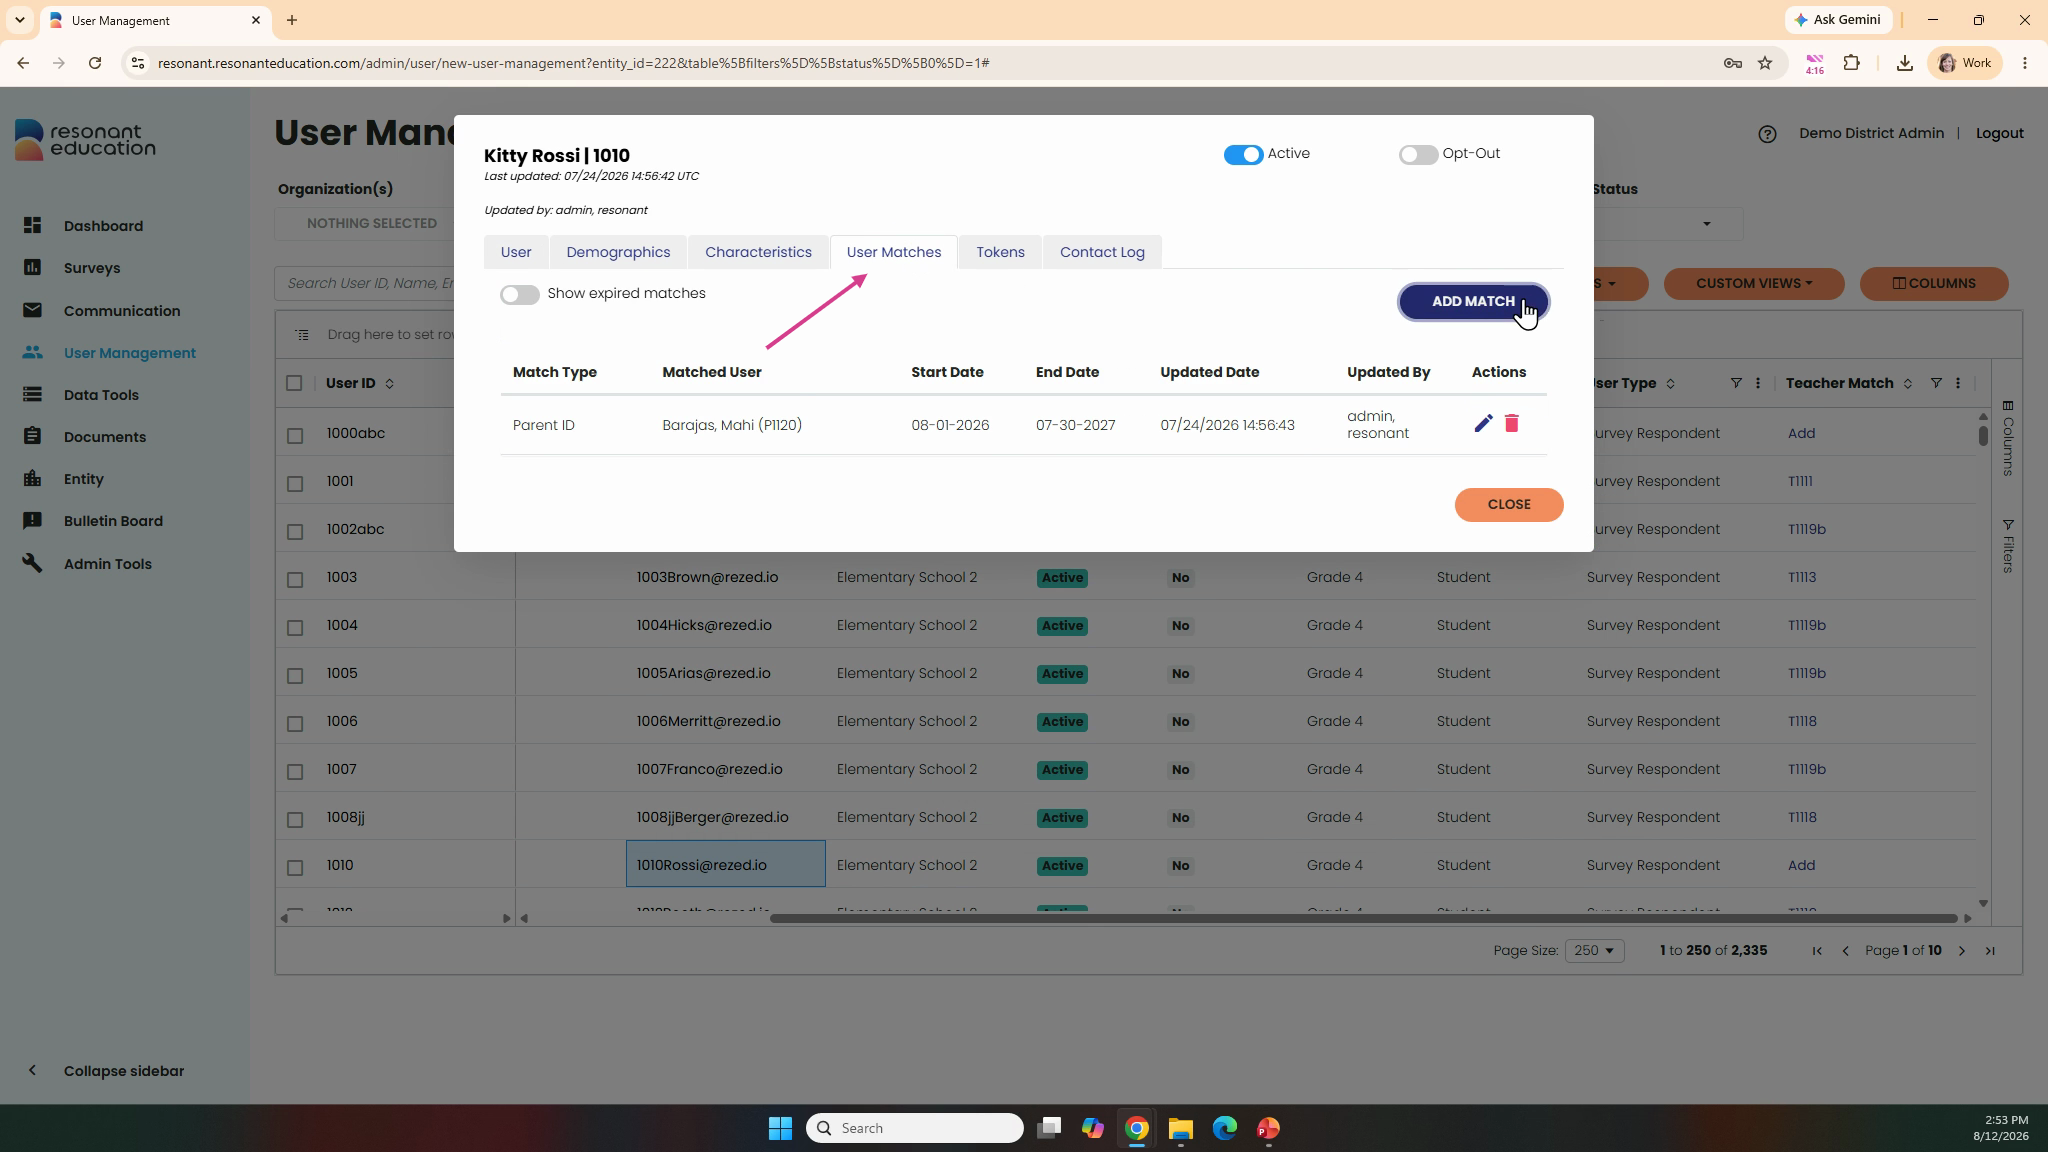
You can also add matches by clicking on a student’s name, going to their User Match tab, and using the Add Match button.
For more detailed instructions on entering or editing matches, check out the help videos available in your portal. User matches keep survey responses accurate and organized. By pairing subjects and respondents correctly, your data will make sense, and your surveys will be easy to manage.