
Using Enhanced Table Features in the ResEd Admin Portal
Enhanced table features in the admin portal make managing users, tokens, or scanning communication logs a breeze. These tools work the same way across every table, ensuring a consistent and efficient experience.
Use this guide to explore the best ways to filter, sort, customize, and organize your data—using user management as our primary example.
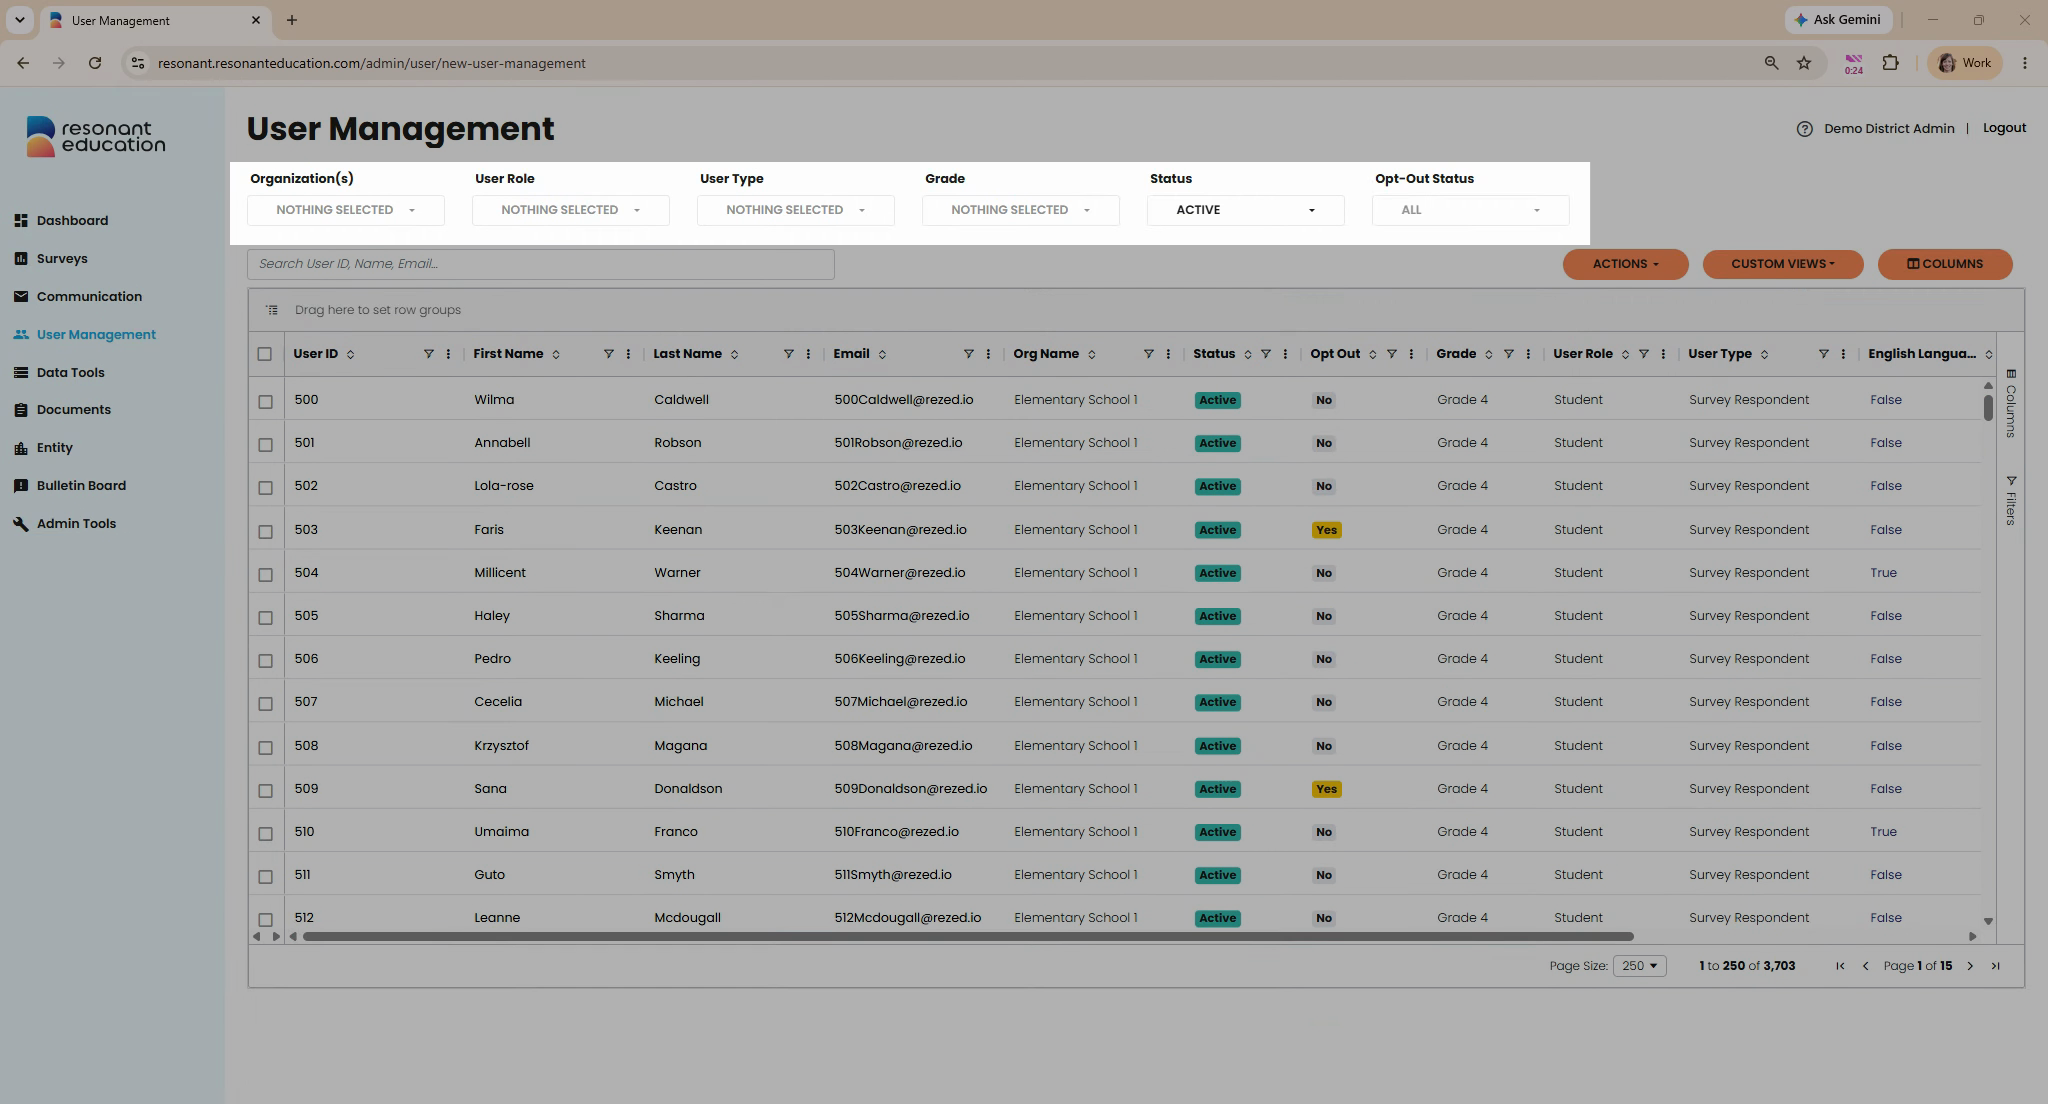
Step 1: Locate the global filters at the top of any table. Global filters quickly narrow down the data set before you even start looking through the individual rows.
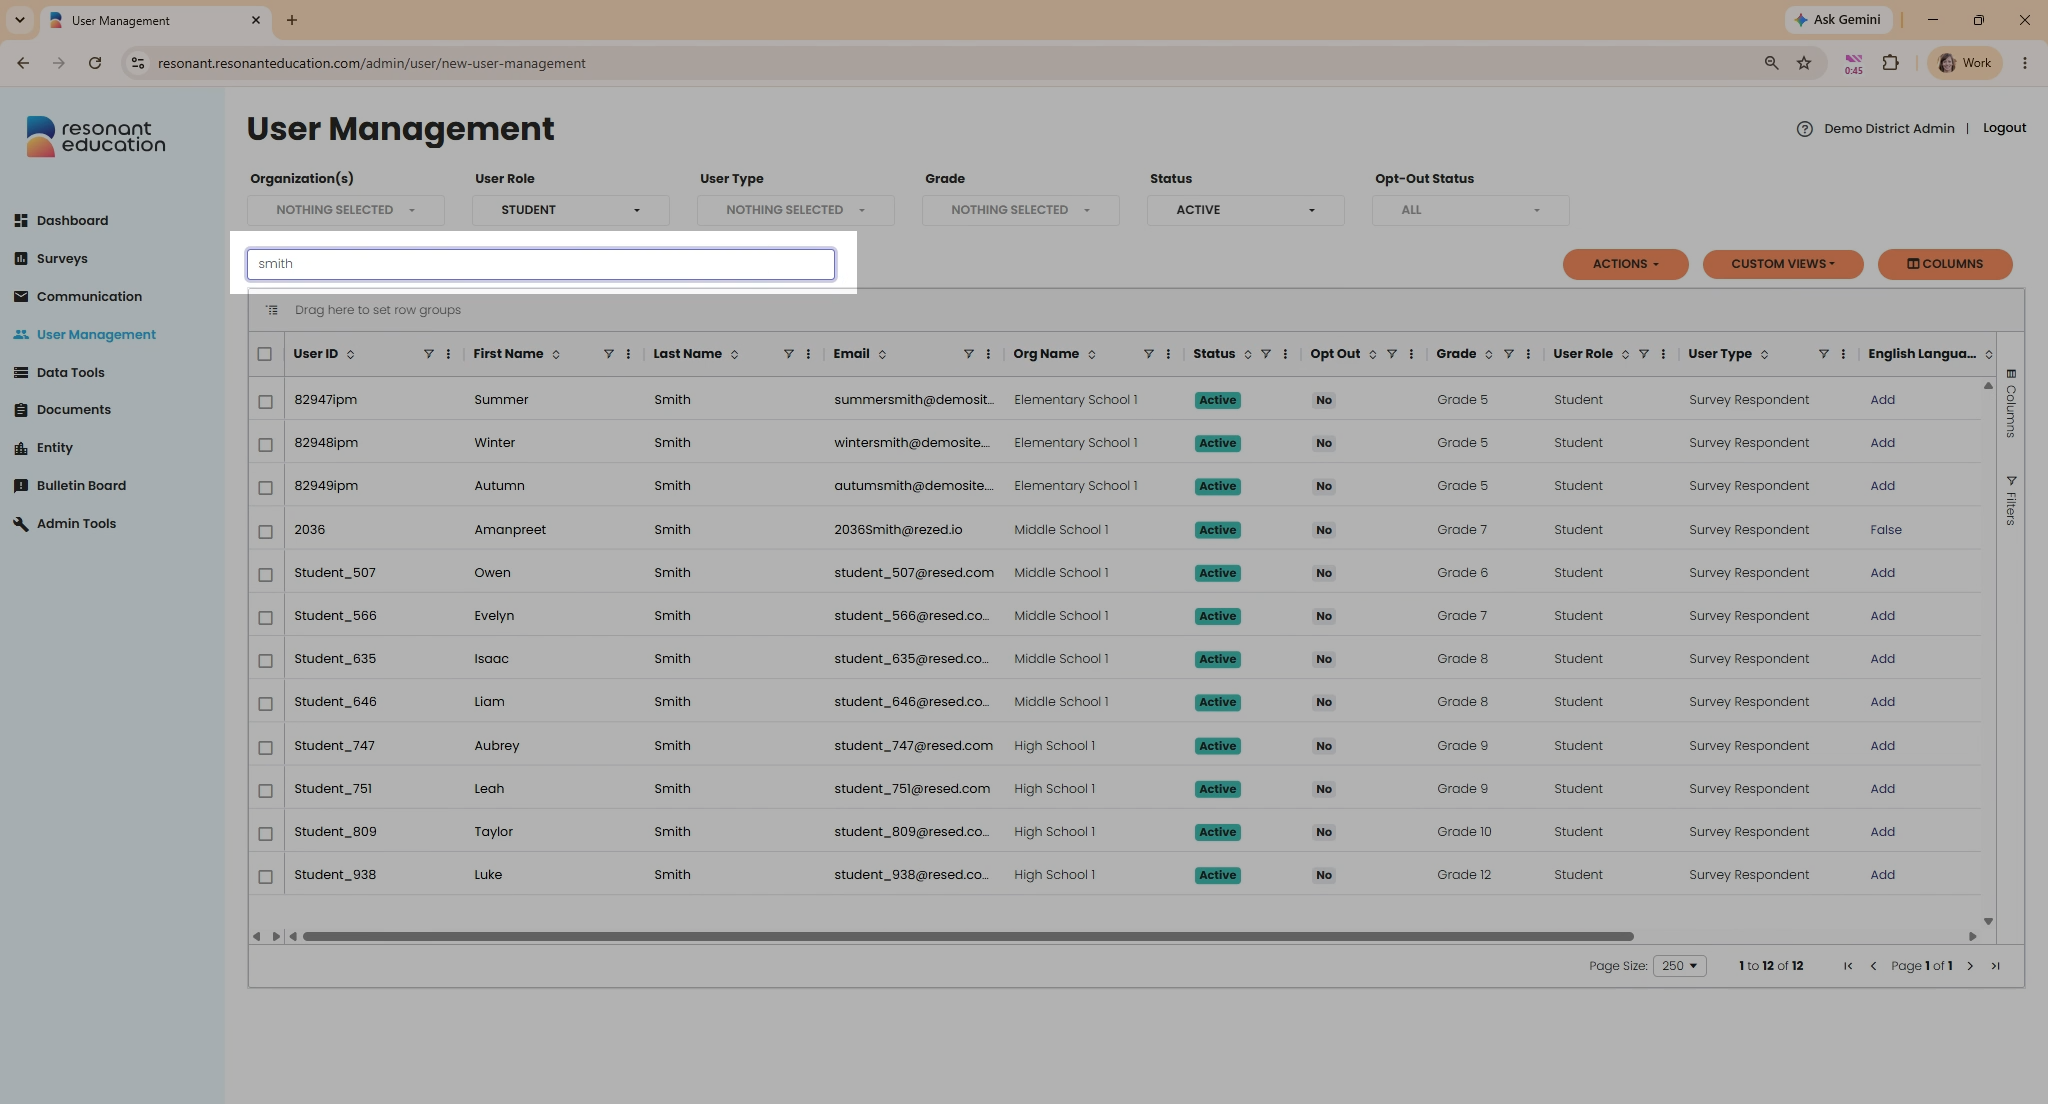
Step 2: Use the global search bar to find any term. Type a search term above the table to instantly filter rows across every data field.
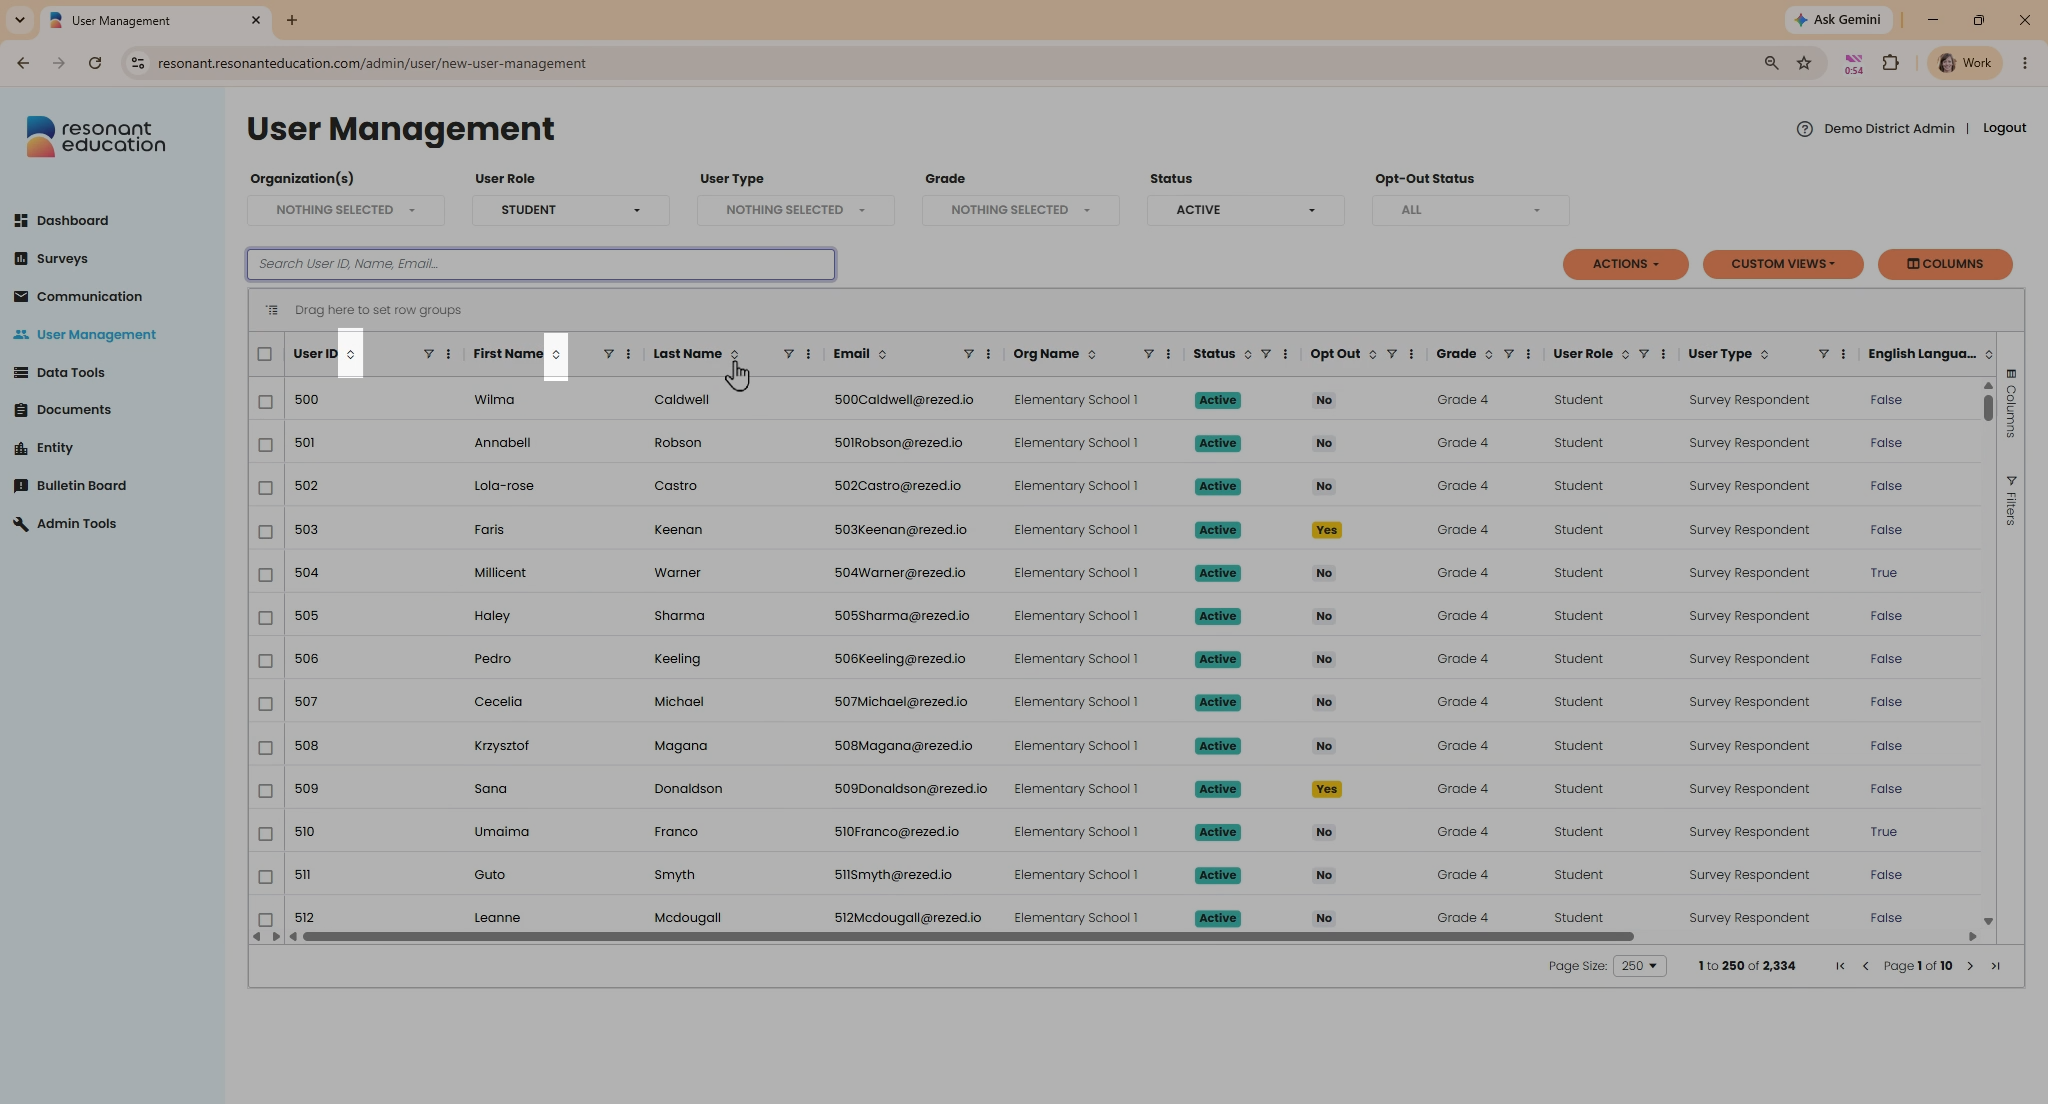
Step 3: Sort your data by clicking any column header.
Click once to sort ascending, and again for descending.
Step 4: Adjust column widths by dragging or double-clicking column borders to auto-fit the contents. 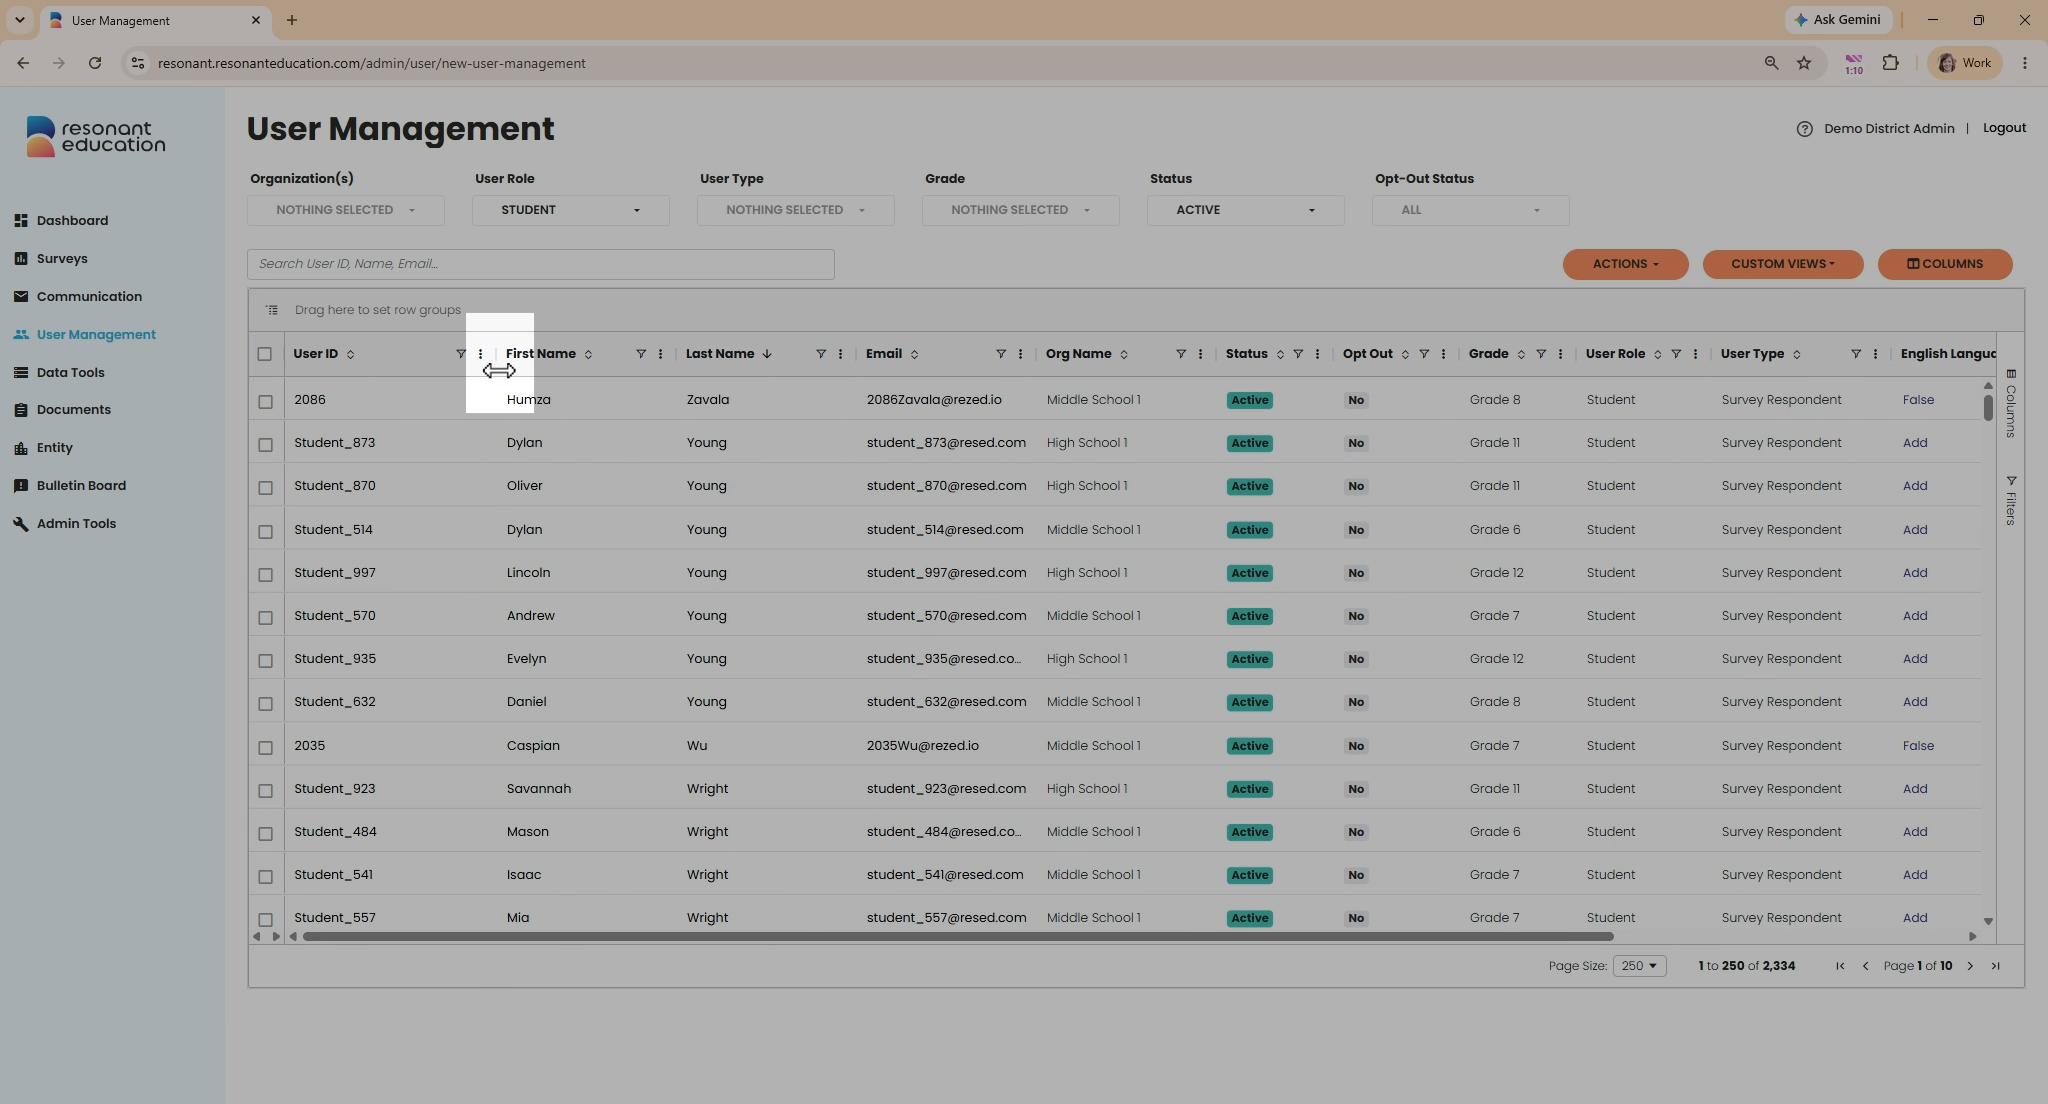
Step 5: Reorder columns by clicking and dragging the column headers. Put your most-used data exactly where you want it.
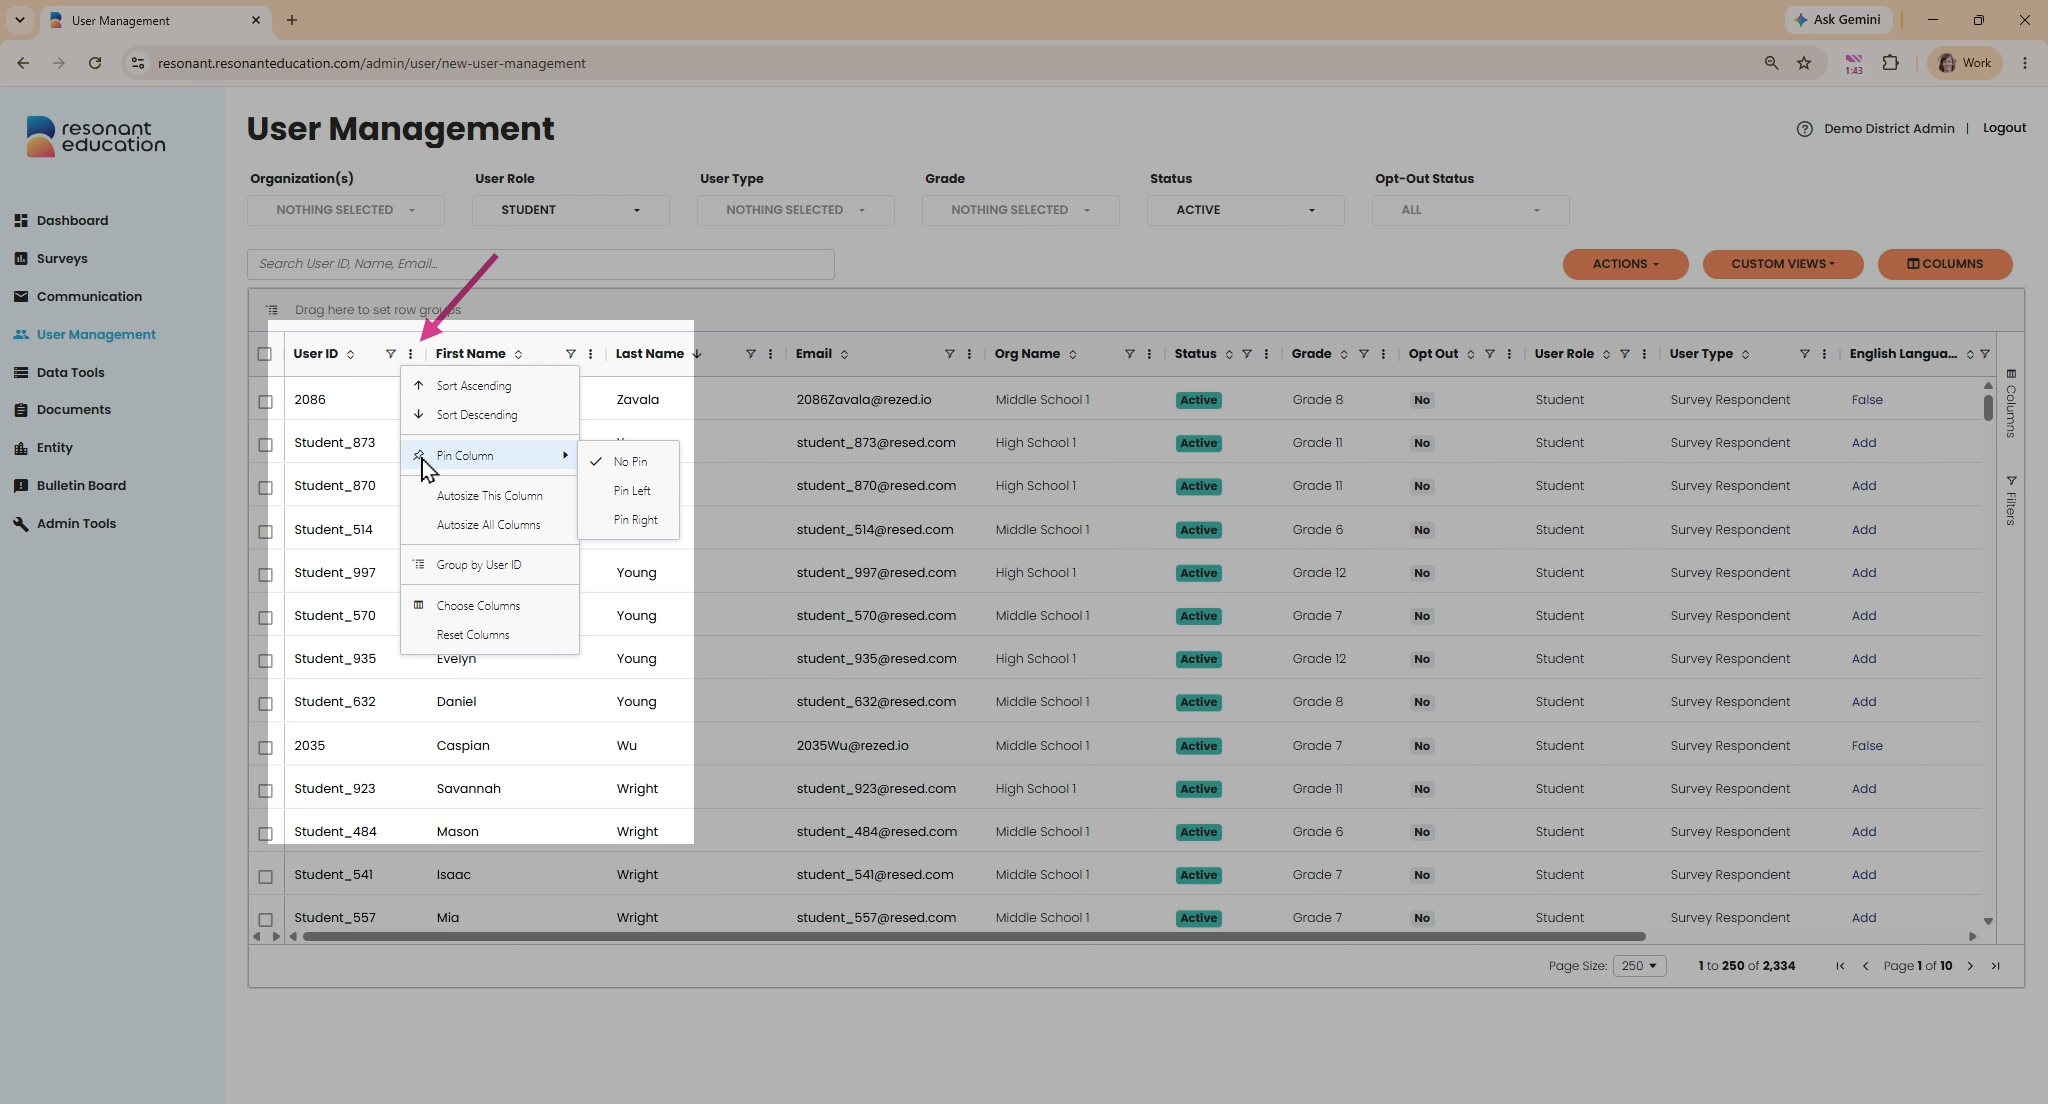
Step 6: Pin columns to keep them visible as you scroll.
Click the three dots at the top of a column, select Pin column, and choose left or right.
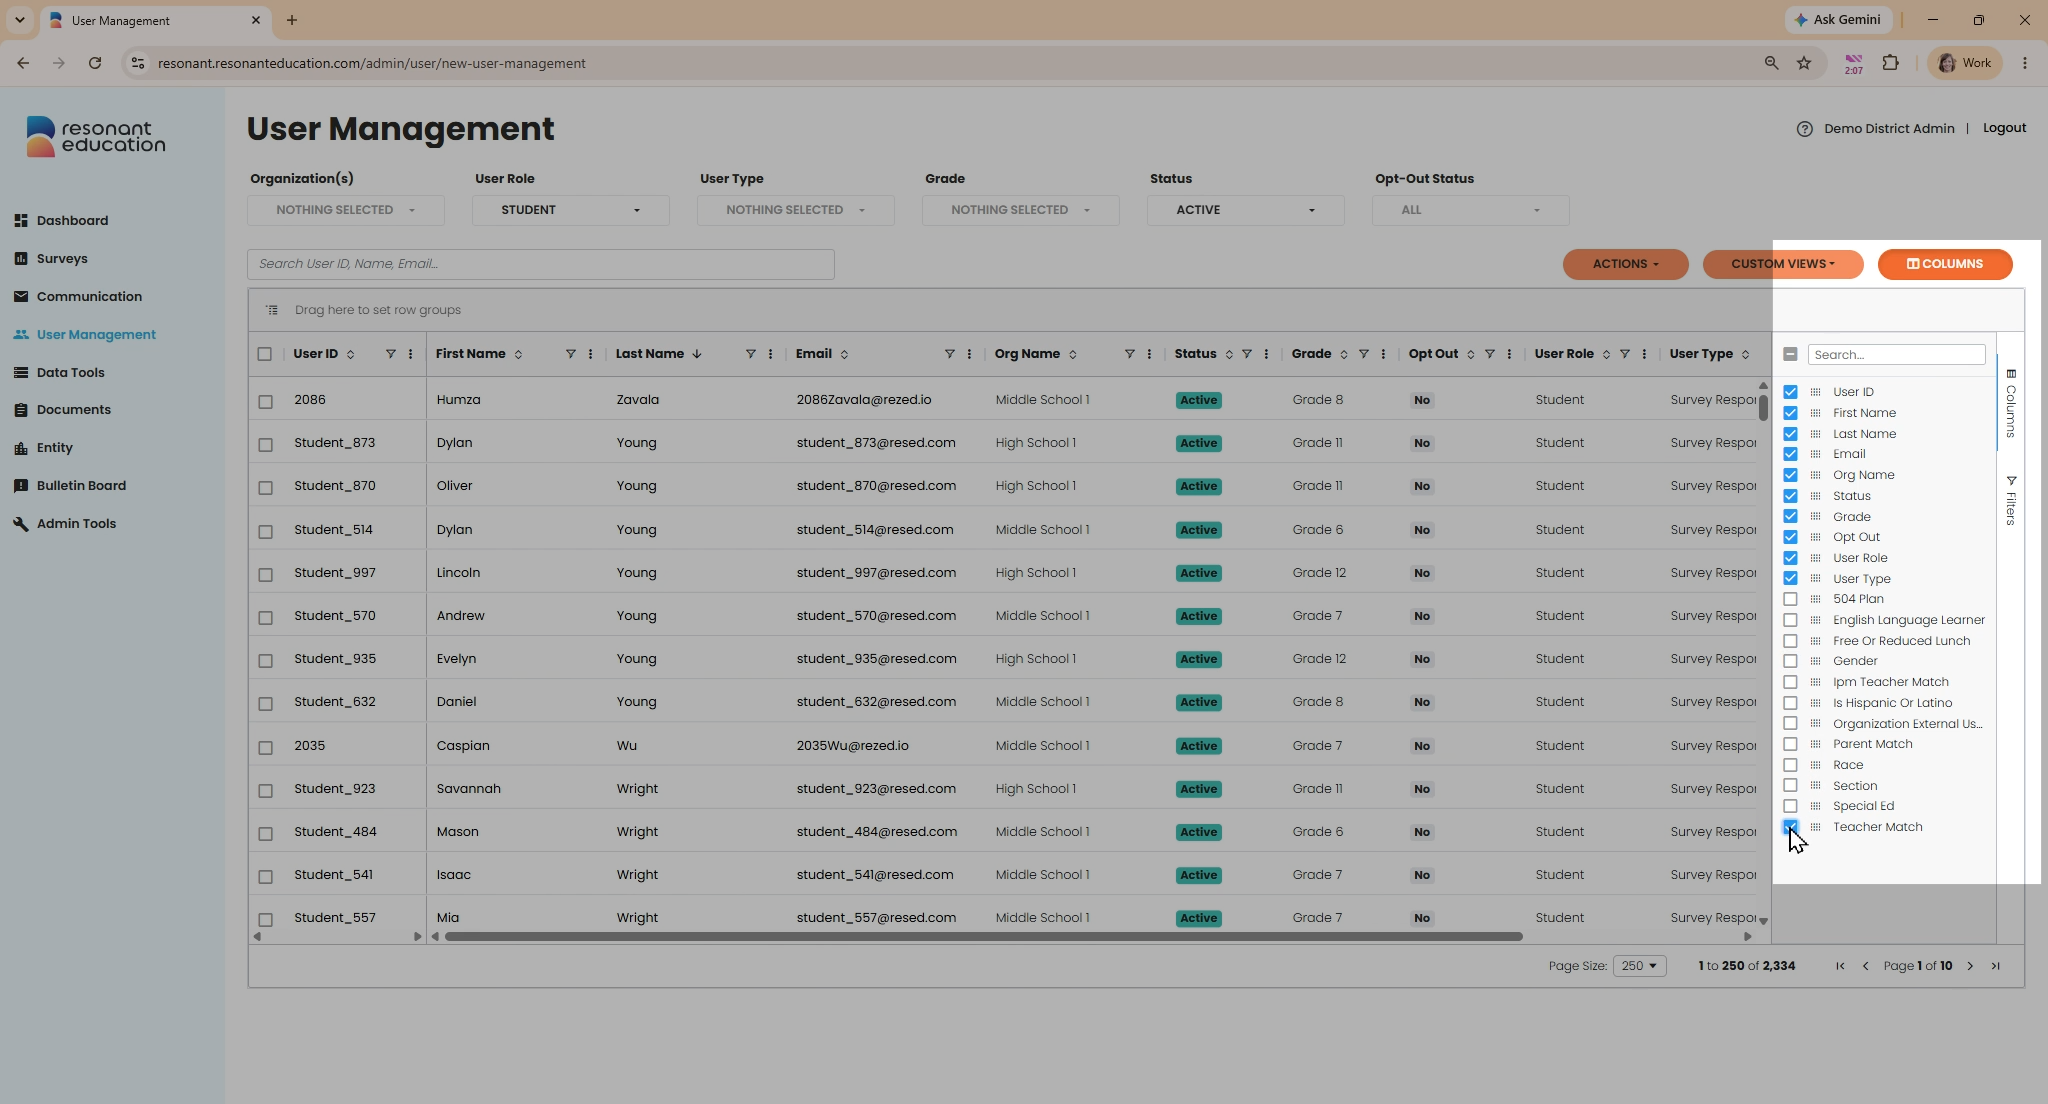
Step 7: Show or hide columns by clicking the Columns button on the right.
Check or uncheck columns to customize your view.
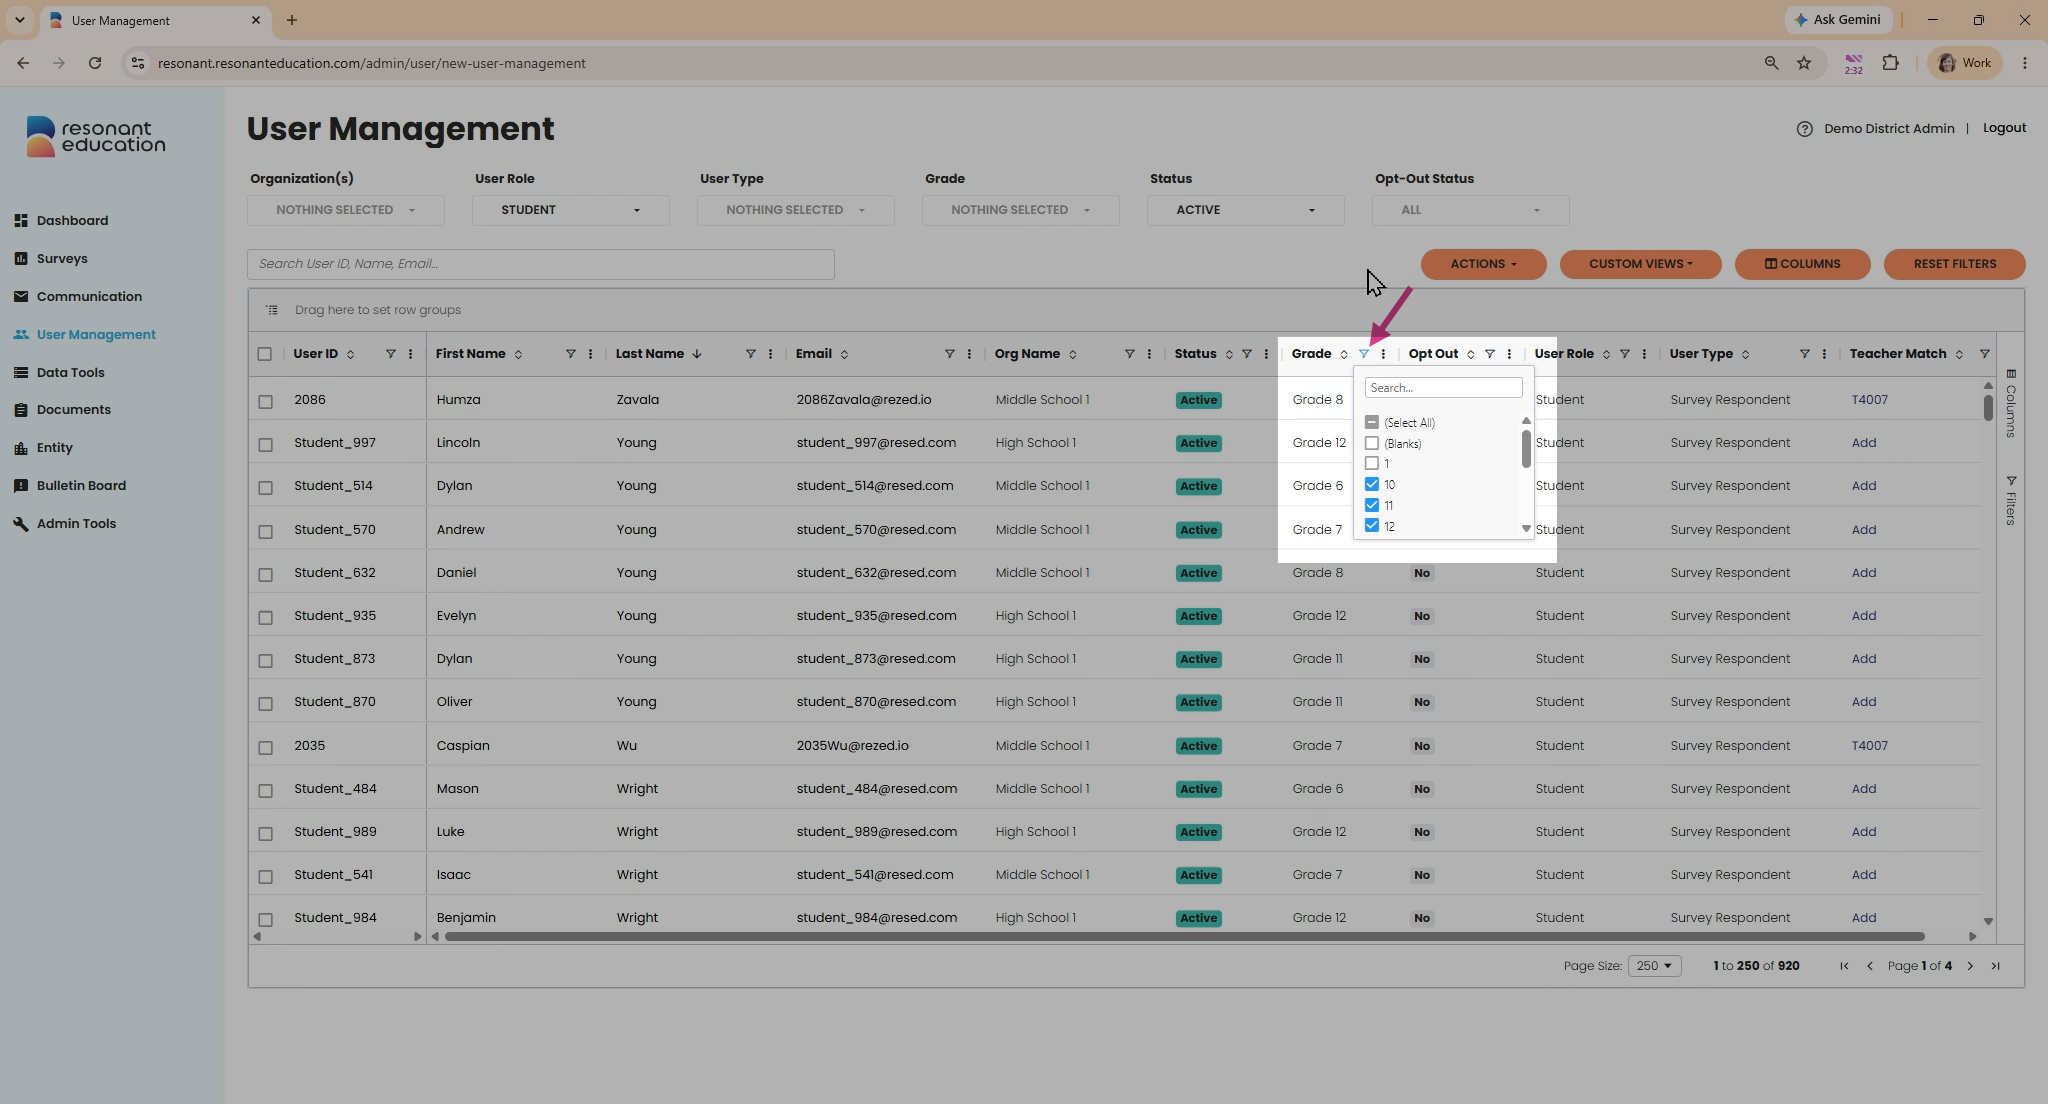
Step 8: Filter individual columns using the filter icon.
Click the filter icon in a column header to narrow down values. For long lists, use the inline search box.
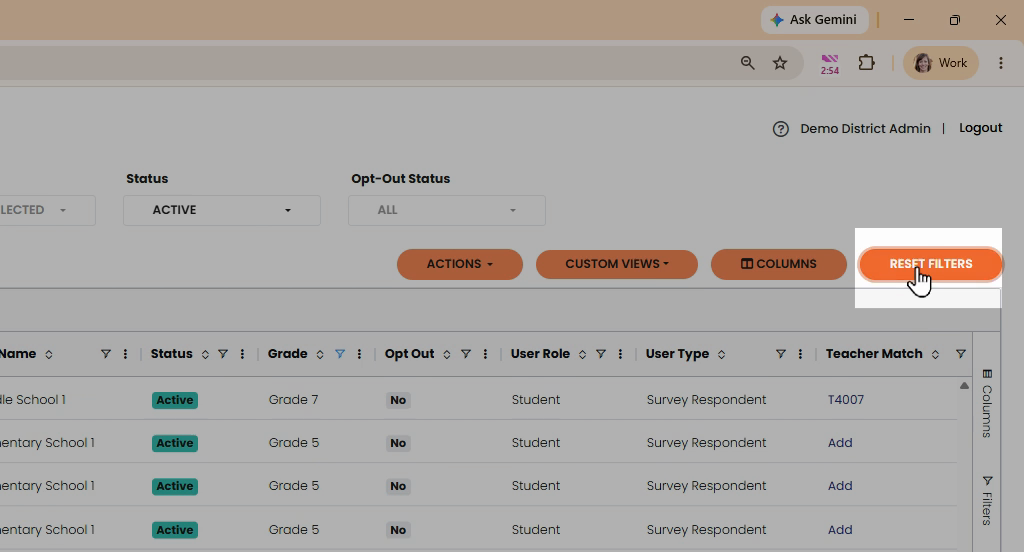
Step 9: Reset your custom filters any time by clicking the Reset Filters button.
Step 10: Group records by dragging column headers to the grouping zone above the table.
Nest data by categories like school campus, organization, or grade level. Group by multiple columns for deeper organization.
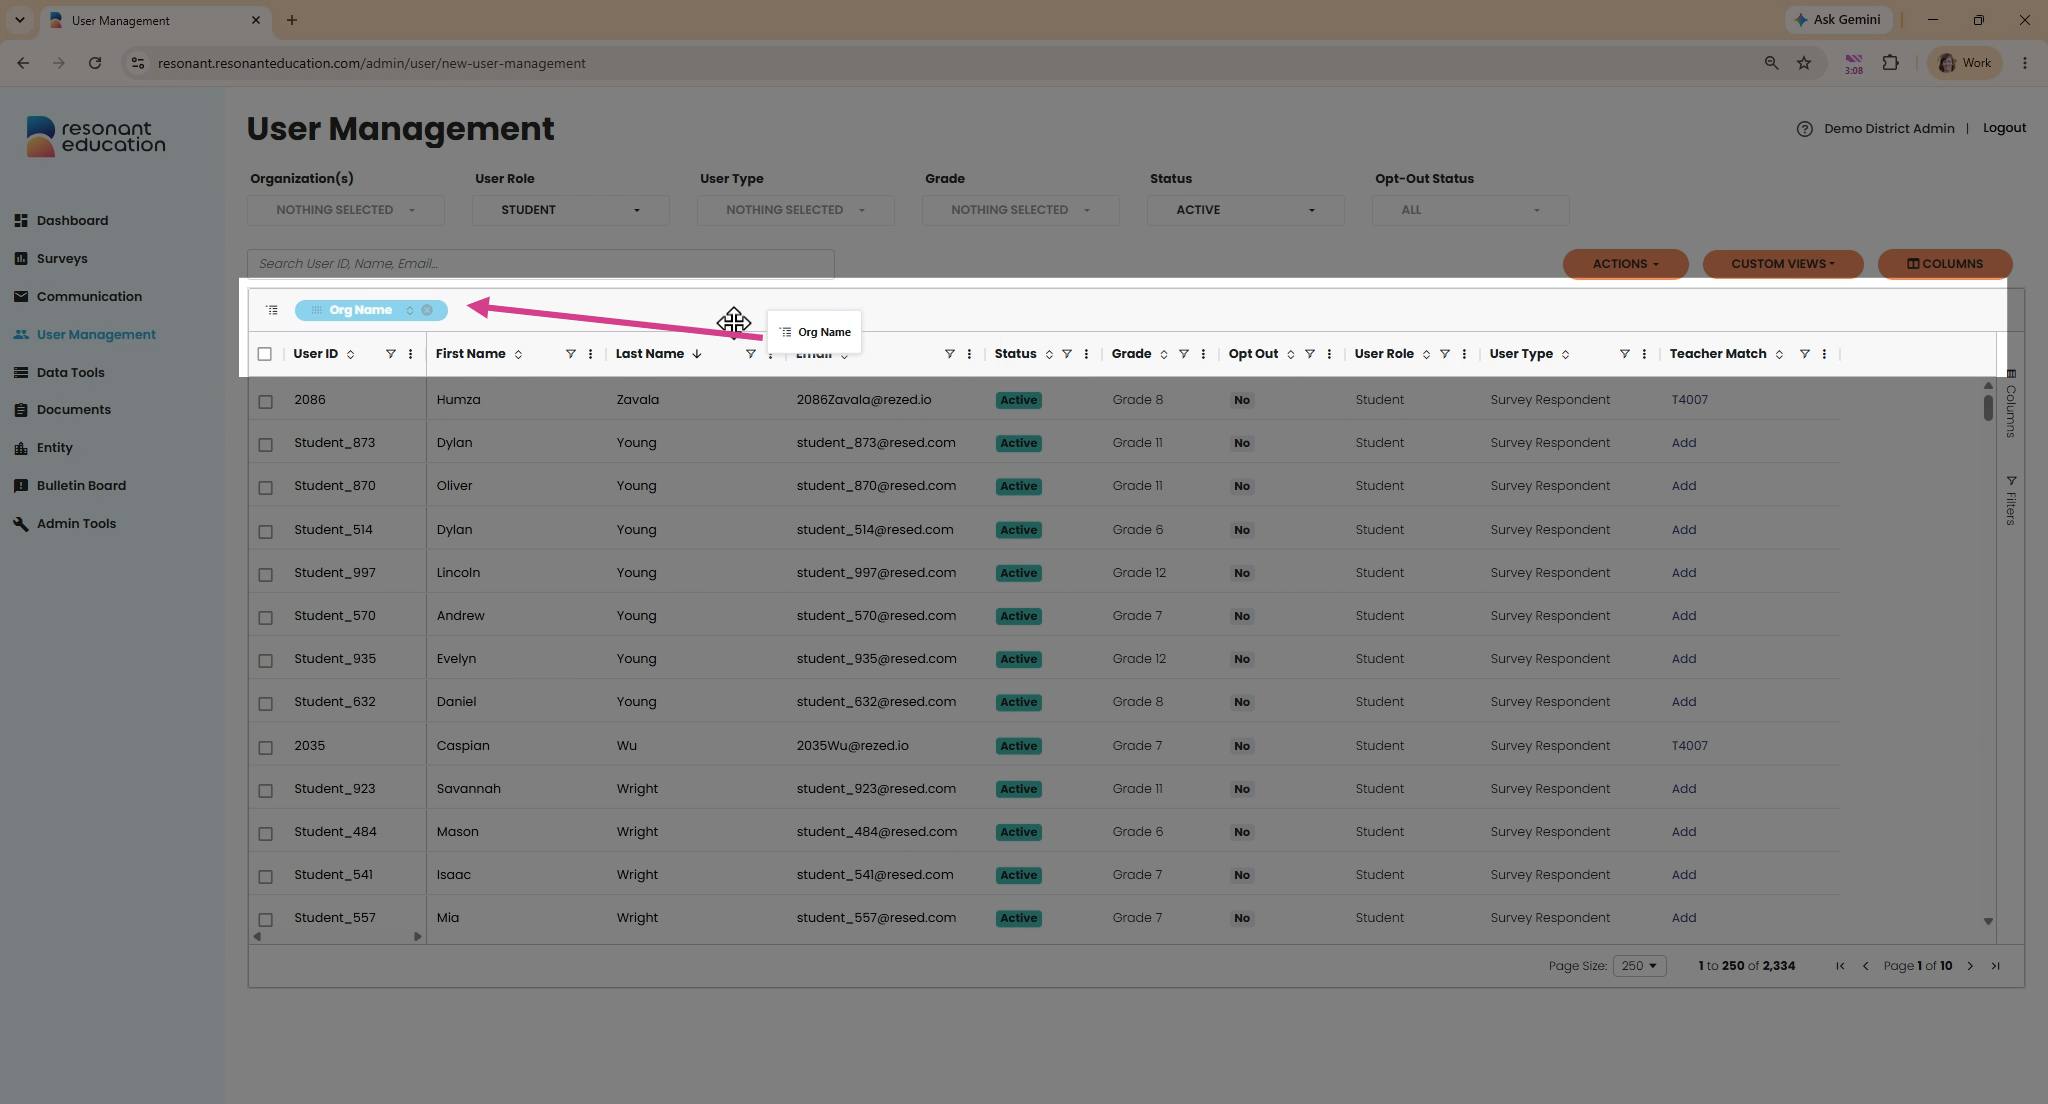
Step 11: Remove groupings by clicking the X on the grouped column in the zone above the table.
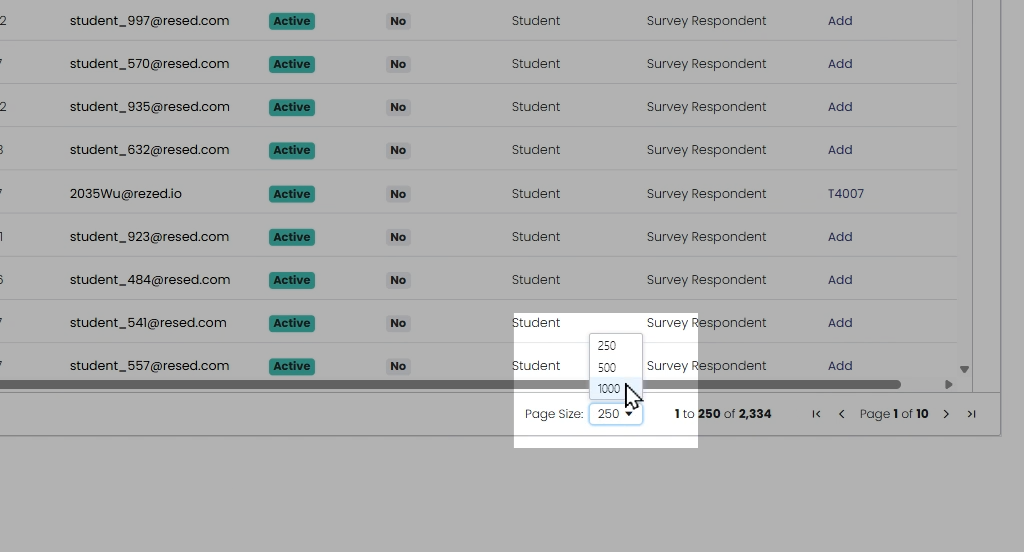
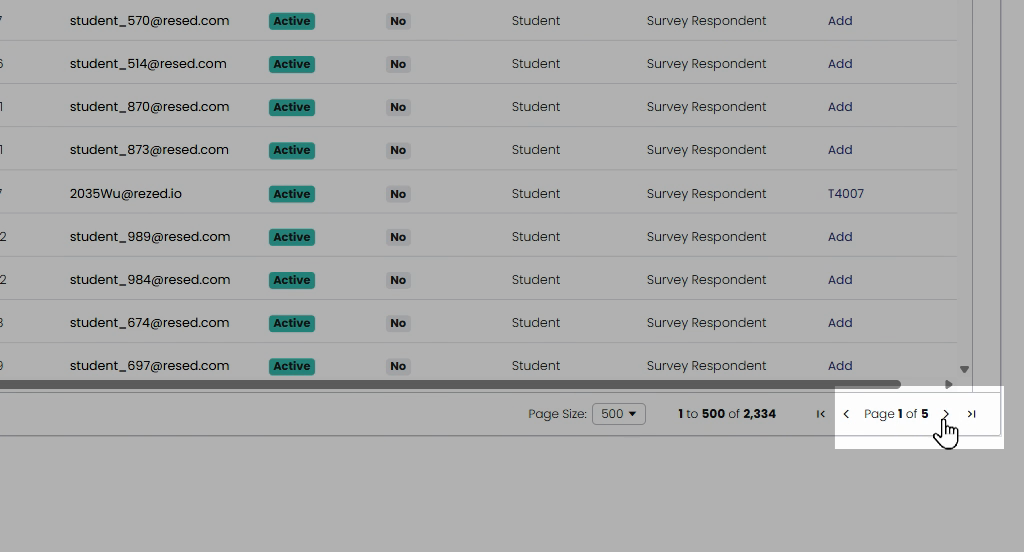
Step 12: Control your page view at the bottom of the grid.
Change the number of records shown and move between pages with the navigation arrows.
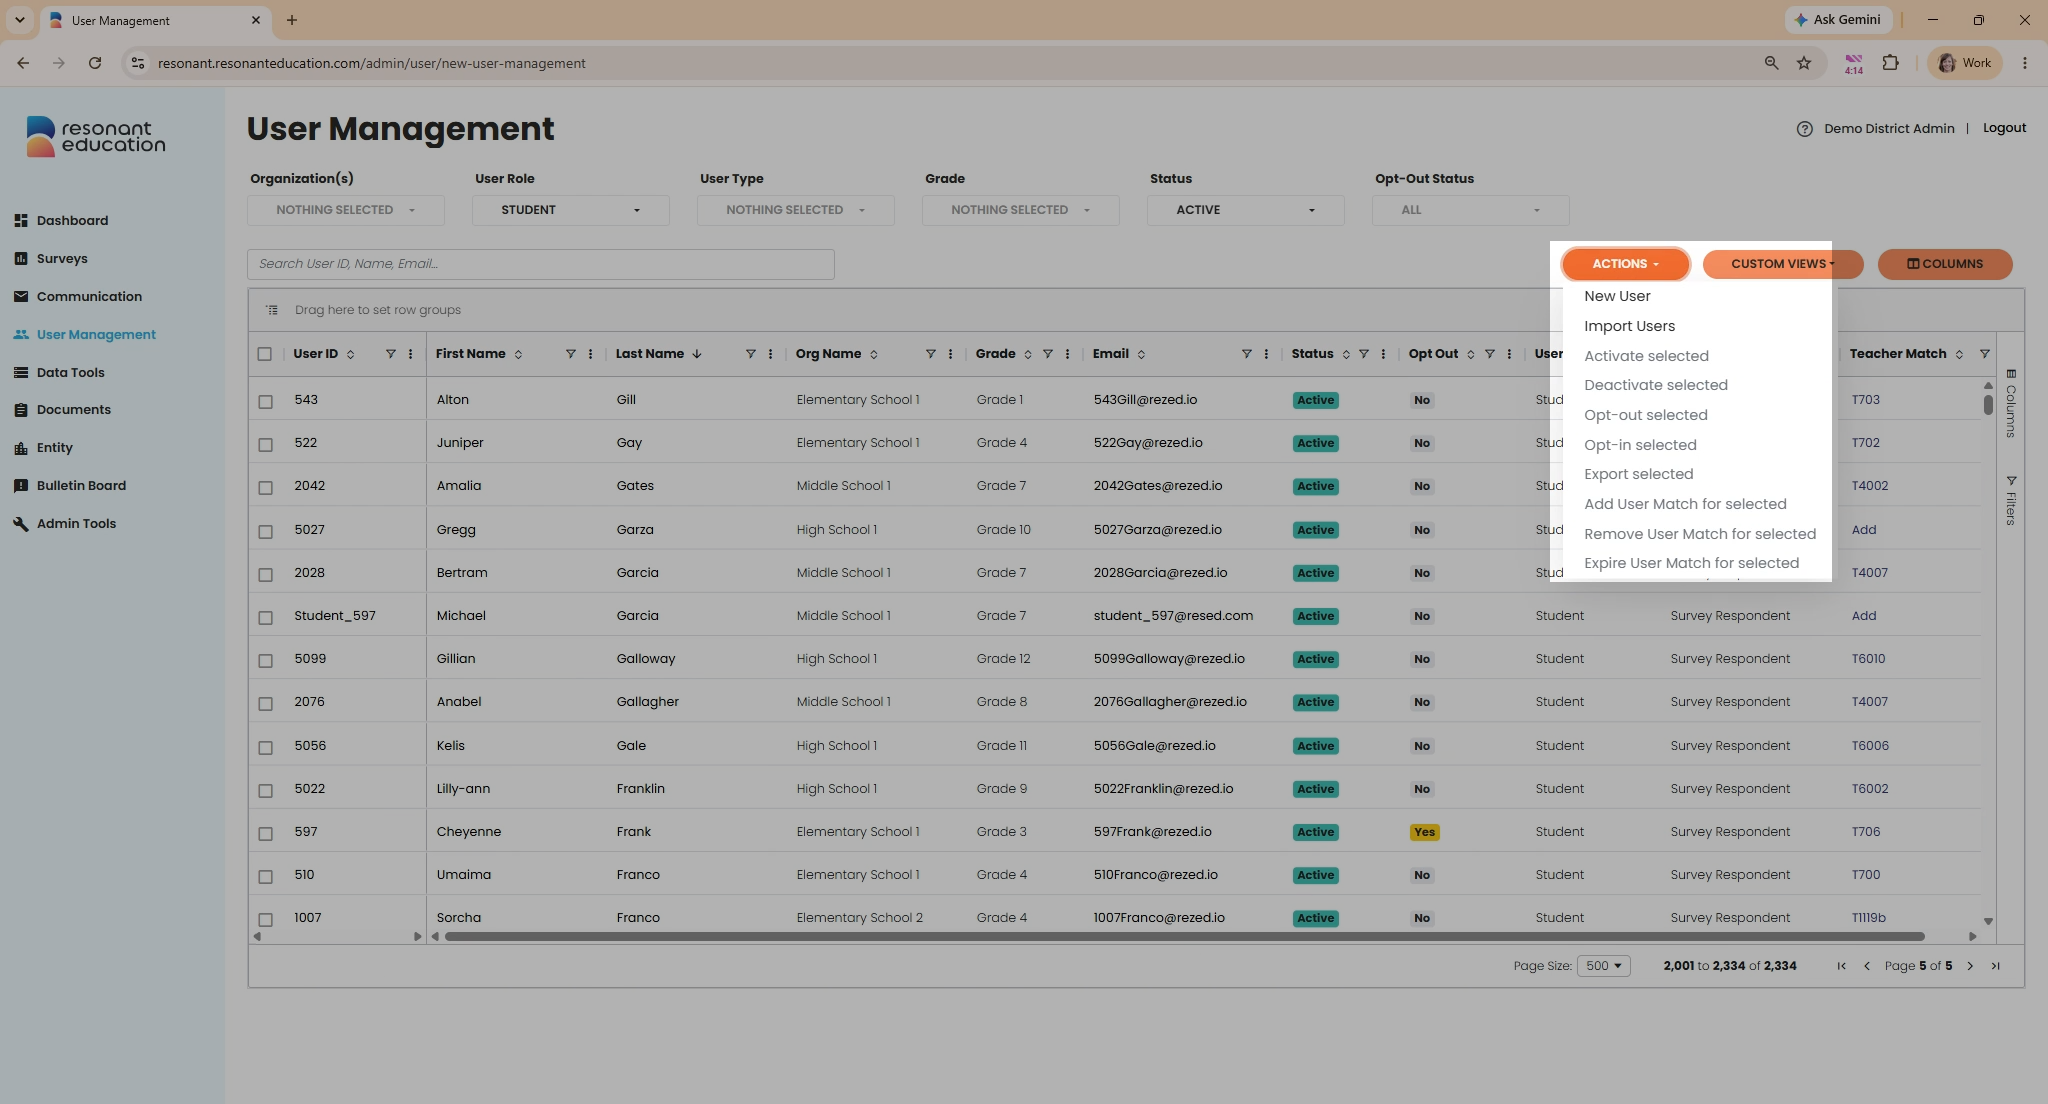
Step 13: Use available action buttons to export data or make bulk updates.
Options may vary by page, so check each page for specifics.
With these consistent tools in Resident Education's portal, finding and organizing information takes just a few clicks. For more advanced tasks or page-specific actions, review our detailed documentation or check out other help videos.